Shoden
| Shoden | ||
|---|---|---|

| ||
| Class: | Tank | |
| Faction | Clan | |
| Ticket cost: | 8 upon destruction | |
| Tier: | 11 | |
| Tonnage: | 70 tons | |
| Speed: |
83 km/h | |
| Turret rotation: | 360° | |
| Turret pitch: | -10° to +80° | |
| Variant Armament | ||
| Variant | Weapons | Equipment |
| Prime: Price: 76 500 CBills Total armor: 44 240 Engine: Fusion 260 |
|
|
| A: Price: 74 000 CBills Total armor: 42 400 Engine: Fusion 260 |
|
|
| B: Price: 73 000 CBills Total armor: 38 720 Engine: Fusion 260 |
||
| C: Price: 78 400 CBills Total armor: 42 400 Engine: Fusion 260 |
||
| D: Price: 83 400 CBills Total armor: 42 400 Engine: Fusion 260 |
||
| E: Price: 86 400 CBills Total armor: 42 400 Engine: Fusion 260 |
||
| F: Price: 80 600 CBills Total armor: 42 400 Engine: Fusion 260 |
||
| G: Price: 87 850 CBills Total armor: 44 240 Engine: Fusion 260 |
||
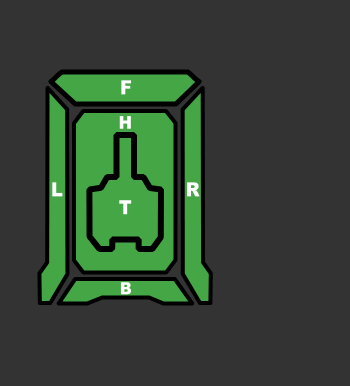
| Armor Points Distribution | ||
|
| ||
All stats current as of release 0.19.1
The Shoden is a Clan wheeled heavy tank. Somewhat faster than the Clan Oro, the Shoden is a faster and slightly better armored counterpart to the IS Rommel tank. Although the Shoden isn't as proficient at anti-aircraft duties as the Huit, its impressive 80° pitch makes it a superb choice for aiming up at targets above it. The Shoden's fast turning main turret is positioned quite high, making it able to shoot over rocks and small hills while protecting it's bulky chassis. Unfortunately this also makes aiming down at targets lower than the Shoden much more difficult despite it's generous -10° turret depression. While other tanks with tall chassis, like the Mars or Morrigu are more suseptible to BA getting in too close to shoot at, the Shoden's drive speed makes this impossible except in close, difficult to maneuver areas.
Contents
Roles and Gameplay Hints
Prime
The Shoden Prime is a high risk, high reward-type asset. It gambles on a deadly array of three ATM9s, all of which are susceptible to a 120m minimum range. This makes the Prime a sitting duck when confronted with anything inside that range that goes faster than 60 kph. When faced with such a situation, the Prime's pilot must decide between ramming the enemy to help allies land their shots or running away and hoping to get outside of 140m. ATM9s do have a somewhat long lock on time. Players are advised to deploy the Prime to improve this, especially against aircraft; make sure to fire at them as they recede, not as they approach. With only one type of weapon, the Prime can dedicate one mouse button to chain fire and another to group fire. Heat isn't much of an issue and three spare tons of ammo keep the Prime well supplied.
Variant A - "Harvester"
The Harvester is a totally loaded missile boat capable of laying down withering fire with its four missile launchers, including a cArrowIV. In close combat, though, the Harvester is virtually defenseless, as it has to rely on a single PDS and battery of CLRMs. Although the Shoden has an easier time acquiring its own targets than most tanks (thanks to its high-mounted turret), the Harvester truly shines when aided by TAG or NARC. The Harvester performs best on flat maps like Harvest (for which it is named), and on maps with long sight lines like Valley Forge. Even when there is terrain, however, the Harvester is able to loft its Arrows over terrain more easily by virtue of its back-mounted, upward-facing launcher.
Variant B
The Shoden B is much like an improved version of the Ares A. Like the Ares, the Shoden is able to use its four high-mounted cUAC2s to carefully peek over hills, avoiding exposing the rest of the B's chassis. Whereas the Ares' backup weapons are medium range, the Shoden B has long range weapons in the form of two cERLLs. Besides up-tonned armor, the B also benefits from four free tons of ammo to keep its cUAC2s firing. The be B does have 10% less armor than other Shodens and should be played more conservatively as a result. Similarly to the Ares A, the Shoden B runs hot when firing all of its weapons. Players are advised to chain fire the cERLLs, after the initially volley, to improve heat dissipation.
Variant C
The Shoden C can operate as a stealthy ambush predator. Utilizing its GECM, the C can hunt for radar contacts without being detected as easily. Its high-mounted turret allows it to peek over hills in search of prey without much exposure and allows it to take pot shots with its two cLBX5s, which, by virtue of their shotgun-like spread, are difficult for enemies to source. Once the C makes its way into medium range, it can wither away enemy armor with four cMPLs. The C has no spare tons of ammo and doesn't need them making it an excellent choice for protracted missions where resupplies are rare.
Variant D
The Shoden D is armed with a cGauss, meaning it doesn't suffer from the spread the E experiences while sniping. The D's ATM9 (HE) unfortunately doesn't provide as much control over the screen shake as the E offers. That said, the D is much better at dealing pinpoint damage, in no small part thanks to its pair of HMLs and cERSLs.
Variant E
The Shoden E is capable of filling multiple roles on the battlefield. Its single HAG30 provides extreme range, and the fact that the Shoden's turret is rather high means that it the E can almost poptart like a mech. The E has amazing close combat potential as the HAG30 can be used quite effectively up close and a pair of DSSRM4s, when chain fired, can cause sustained screen shake. The DSSRM4s have more than enough DPS to make the the E a solid and flexible brawler.
Variant F
The Shoden F focuses nearly all of its weaponry on medium range. This makes the F an excellent high damage poker and skirmisher. Unfortunately, to access all of the F's DPS, players may find themselves exposing it too much. To avoid this, once the cERPPC has been fired, the three cERMLs have been fired twice, and the two cUAC5s have been overheated, players should take cover. If an enemy starts to run away, remember that cERPPCs have substantial splash damage and can be used to secure the kill with one last shot. As for sniping, the F has some ability, with it's cERPPC, but otherwise falls short of this role.
Variant G - "Gowron"
The Gowron is a close combat monster of a tank. Its three Flamers can obscure an enemy's vision and overload their heat sinks while the UAC20 and two DSRM4s make short work of their armor. The Gowron is especially good against slower moving targets as the SRMs can inflict more pinpoint damage. Players driving the Gowron are advised to use its sizeable chassis and considerable speed to zero-throttle isolated enemies to ensure the SRMs can be aimed with greater precision. Enemy BA will find it difficult to approach the Gowron due to its flamers and two PDS.
Canon
Clan Nova Cat’s Shoden assault heavy vehicle appeared quite unexpectedly after the first Dominion-Combine War of 3062-3063, when the wheeled missile transport first rolled off the assembly lines at the newly completed Barcella Beta factory on Irece. With a triple-rack of advanced tactical missiles and a quartet of machine guns, plus the armor to withstand serious punishment, the Shoden excelled in both defensive and assault operations. Khan Santin West realized that his Clan must attempt to further adopt some Inner Sphere style combat tactics if the Nova Cats were to survive, particularly that of combined units.
Date Introduced 3068 during the Era known as "Jihad" (3068 - 3085) - Unit Role: Combat Vehicle - Wheeled Brawler