Difference between revisions of "Maps"
Bird Thing (talk | contribs) m (→SA (Solaris Arena) Maps:: temp preview/thumbnail image added for SA_Glory) |
(replaced few of the widest images and narrowed down the content cells a bit) |
||
| Line 8: | Line 8: | ||
<div style="width:95%; margin:auto; text-align: center; margin-top:10px; margin-bottom:30px> | <div style="width:95%; margin:auto; text-align: center; margin-top:10px; margin-bottom:30px> | ||
{| style="display: inline-block" | {| style="display: inline-block" | ||
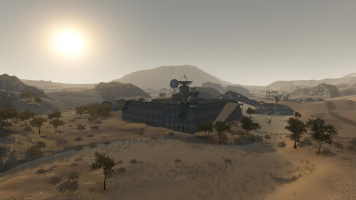
| − | {{ContentCell| | + | {{ContentCell|420px|[[TC Altay]]| |
[[Image:TC_Altay.jpg|x200px|link=TC Altay]]}} | [[Image:TC_Altay.jpg|x200px|link=TC Altay]]}} | ||
|} | |} | ||
{| style="display: inline-block" | {| style="display: inline-block" | ||
| − | {{ContentCell| | + | {{ContentCell|420px|[[TC Bogs]]| |
[[Image:TC_Bogs.jpg|x200px|link=TC Bogs]]}} | [[Image:TC_Bogs.jpg|x200px|link=TC Bogs]]}} | ||
|} | |} | ||
{| style="display: inline-block" | {| style="display: inline-block" | ||
| − | {{ContentCell| | + | {{ContentCell|420px|[[TC DeathValley]]| |
[[Image:TC_DeathValley.jpg|x200px|link=TC DeathValley]]}} | [[Image:TC_DeathValley.jpg|x200px|link=TC DeathValley]]}} | ||
|} | |} | ||
{| style="display: inline-block" | {| style="display: inline-block" | ||
| − | {{ContentCell| | + | {{ContentCell|420px|[[TC Dune]]| |
[[Image:TC Dune-4 crop.jpg|x200px|link=TC Dune]]}} | [[Image:TC Dune-4 crop.jpg|x200px|link=TC Dune]]}} | ||
|} | |} | ||
{| style=" display: inline-block" | {| style=" display: inline-block" | ||
| − | {{ContentCell| | + | {{ContentCell|420px|[[TC DustBowl]]| |
[[Image:TC_Dustbowl.jpg|x200px|link=TC DustBowl]]}} | [[Image:TC_Dustbowl.jpg|x200px|link=TC DustBowl]]}} | ||
|} | |} | ||
{| style="display: inline-block" | {| style="display: inline-block" | ||
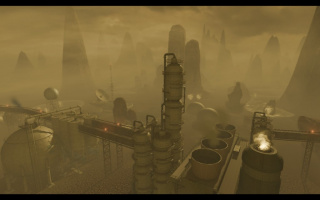
| − | {{ContentCell| | + | {{ContentCell|420px|[[TC Enkeladus]]| |
[[Image:TC_Enkeladus.jpg|x200px|link=TC Enkeladus]]}} | [[Image:TC_Enkeladus.jpg|x200px|link=TC Enkeladus]]}} | ||
|} | |} | ||
{| style="display: inline-block" | {| style="display: inline-block" | ||
| − | {{ContentCell| | + | {{ContentCell|420px|[[TC Forsaken]]| |
[[Image:TC_Forsaken2.jpg|x200px|link=TC Forsaken]]}} | [[Image:TC_Forsaken2.jpg|x200px|link=TC Forsaken]]}} | ||
|} | |} | ||
{| style="display: inline-block" | {| style="display: inline-block" | ||
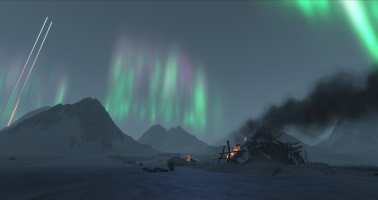
| − | {{ContentCell| | + | {{ContentCell|420px|[[TC Frostbite]]| |
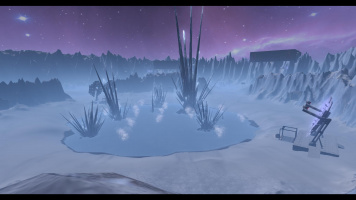
[[Image:Frostbite.jpg|x200px|link=TC Frostbite]]}} | [[Image:Frostbite.jpg|x200px|link=TC Frostbite]]}} | ||
|} | |} | ||
{| style="display: inline-block" | {| style="display: inline-block" | ||
| − | {{ContentCell| | + | {{ContentCell|420px|[[TC Harvest]]| |
[[Image:TC_Harvest.jpg|x200px|link=TC Harvest]]}} | [[Image:TC_Harvest.jpg|x200px|link=TC Harvest]]}} | ||
|} | |} | ||
{| style="display: inline-block" | {| style="display: inline-block" | ||
| − | {{ContentCell| | + | {{ContentCell|420px|[[TC Inferno]]| |
[[Image:SA_Inferno.jpg|x200px|link=TC Inferno]]}} | [[Image:SA_Inferno.jpg|x200px|link=TC Inferno]]}} | ||
|} | |} | ||
{| style="display: inline-block" | {| style="display: inline-block" | ||
| − | {{ContentCell| | + | {{ContentCell|420px|[[TC IvoryTower]]| |
[[Image:TC_IvoryTower.jpg|x200px|link=TC IvoryTower]]}} | [[Image:TC_IvoryTower.jpg|x200px|link=TC IvoryTower]]}} | ||
|} | |} | ||
{| style="display: inline-block" | {| style="display: inline-block" | ||
| − | {{ContentCell| | + | {{ContentCell|420px|[[TC Kagoshima]]| |
[[Image:TC_Kagoshima.jpg|x200px|link=TC Kagoshima]]}} | [[Image:TC_Kagoshima.jpg|x200px|link=TC Kagoshima]]}} | ||
|} | |} | ||
{| style=" display: inline-block" | {| style=" display: inline-block" | ||
| − | {{ContentCell| | + | {{ContentCell|420px|[[TC Marshes]]| |
[[Image:Marshes.jpg|x200px|link=TC Marshes]]}} | [[Image:Marshes.jpg|x200px|link=TC Marshes]]}} | ||
|} | |} | ||
{| style="display: inline-block" | {| style="display: inline-block" | ||
| − | {{ContentCell| | + | {{ContentCell|420px|[[TC Mirage]]| |
[[Image:TC_MirageOverview.jpg|x200px|link=TC Mirage]]}} | [[Image:TC_MirageOverview.jpg|x200px|link=TC Mirage]]}} | ||
|} | |} | ||
{| style="display: inline-block" | {| style="display: inline-block" | ||
| − | {{ContentCell| | + | {{ContentCell|420px|[[TC Oasis]]| |
[[Image:TC_Oasis-7_crop.jpg|x200px|link=TC Oasis]]}} | [[Image:TC_Oasis-7_crop.jpg|x200px|link=TC Oasis]]}} | ||
|} | |} | ||
{| style="display: inline-block" | {| style="display: inline-block" | ||
| − | {{ContentCell| | + | {{ContentCell|420px|[[TC Outskirts]]| |
[[Image:TC_Outskirts-1.jpg|x200px|link=TC Outskirts]]}} | [[Image:TC_Outskirts-1.jpg|x200px|link=TC Outskirts]]}} | ||
|} | |} | ||
{| style="display: inline-block" | {| style="display: inline-block" | ||
| − | {{ContentCell| | + | {{ContentCell|420px|[[TC Palisades]]| |
[[Image:MWLL-_logo.png|x200px|link=TC Palisades]]}} | [[Image:MWLL-_logo.png|x200px|link=TC Palisades]]}} | ||
|} | |} | ||
{| style="display: inline-block" | {| style="display: inline-block" | ||
| − | {{ContentCell| | + | {{ContentCell|420px|[[TC Sandblasted]]| |
[[Image:TSA_Sandblasted.jpg|x200px|link=TC Sandblasted]]}} | [[Image:TSA_Sandblasted.jpg|x200px|link=TC Sandblasted]]}} | ||
|} | |} | ||
{| style="display: inline-block" | {| style="display: inline-block" | ||
| − | {{ContentCell| | + | {{ContentCell|420px|[[TC Scorched]]| |
[[Image:TC_Scorched1_crop.jpg|x200px|link=TC Scorched]]}} | [[Image:TC_Scorched1_crop.jpg|x200px|link=TC Scorched]]}} | ||
|} | |} | ||
{| style="display: inline-block" | {| style="display: inline-block" | ||
| − | {{ContentCell| | + | {{ContentCell|420px|[[TC StoneRose]]| |
[[Image:TC StoneRoseV2-2 crop.jpg|x200px|link=TC StoneRose]]}} | [[Image:TC StoneRoseV2-2 crop.jpg|x200px|link=TC StoneRose]]}} | ||
|} | |} | ||
{| style="display: inline-block" | {| style="display: inline-block" | ||
| − | {{ContentCell| | + | {{ContentCell|420px|[[TC Taiga]]| |
[[Image:TC_Taiga.jpg|x200px|link=TC Taiga]]}} | [[Image:TC_Taiga.jpg|x200px|link=TC Taiga]]}} | ||
|} | |} | ||
{| style="display: inline-block" | {| style="display: inline-block" | ||
| − | {{ContentCell| | + | {{ContentCell|420px|[[TC ThunderRift]]| |
[[Image:Thunder-Rift.jpg|x200px|link=TC ThunderRift]]}} | [[Image:Thunder-Rift.jpg|x200px|link=TC ThunderRift]]}} | ||
|} | |} | ||
{| style="display: inline-block" | {| style="display: inline-block" | ||
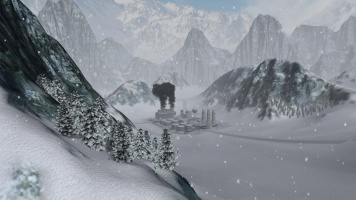
| − | {{ContentCell| | + | {{ContentCell|420px|[[TC Tukayyid]]| |
[[Image:Tukk-3-dusk crop.jpg|x200px|link=TC Tukayyid]]}} | [[Image:Tukk-3-dusk crop.jpg|x200px|link=TC Tukayyid]]}} | ||
|} | |} | ||
{| style="display: inline-block" | {| style="display: inline-block" | ||
| − | {{ContentCell| | + | {{ContentCell|420px|[[TC ValleyForge]]| |
[[Image:TC_ValleyForge.jpg|x200px|link=TC ValleyForge]]}} | [[Image:TC_ValleyForge.jpg|x200px|link=TC ValleyForge]]}} | ||
|} | |} | ||
{| style="display: inline-block" | {| style="display: inline-block" | ||
| − | {{ContentCell| | + | {{ContentCell|420px|[[TC Wildlands]]| |
[[Image:TC_Wildlands-9_crop.jpg|x200px|link=TC Wildlands]]}} | [[Image:TC_Wildlands-9_crop.jpg|x200px|link=TC Wildlands]]}} | ||
|} | |} | ||
| Line 116: | Line 116: | ||
<div style="width:95%; margin:auto; text-align: center; margin-top:10px; margin-bottom:30px> | <div style="width:95%; margin:auto; text-align: center; margin-top:10px; margin-bottom:30px> | ||
{| style="display: inline-block" | {| style="display: inline-block" | ||
| − | {{ContentCell| | + | {{ContentCell|420px|[[TSA Clearcut]]| |
| − | [[Image:Clearcut.jpg|x200px|link=TSA Clearcut]]}} | + | [[Image:TSA Clearcut crop.jpg|x200px|link=TSA Clearcut]]}} |
|} | |} | ||
{| style="display: inline-block" | {| style="display: inline-block" | ||
| − | {{ContentCell| | + | {{ContentCell|420px|[[TSA Extremity]]| |
[[Image:Extremity.jpg|x200px|link=TSA Extremity]]}} | [[Image:Extremity.jpg|x200px|link=TSA Extremity]]}} | ||
|} | |} | ||
{| style="display: inline-block" | {| style="display: inline-block" | ||
| − | {{ContentCell| | + | {{ContentCell|420px|[[TSA Frostbite]]| |
[[Image:Frostbite.jpg|x200px|link=TSA Frostbite]]}} | [[Image:Frostbite.jpg|x200px|link=TSA Frostbite]]}} | ||
|} | |} | ||
{| style="display: inline-block" | {| style="display: inline-block" | ||
| − | {{ContentCell| | + | {{ContentCell|420px|[[TSA Marshes]]| |
[[Image:Marshes.jpg|x200px|link=TSA Marshes]]}} | [[Image:Marshes.jpg|x200px|link=TSA Marshes]]}} | ||
|} | |} | ||
{| style="display: inline-block" | {| style="display: inline-block" | ||
| − | {{ContentCell| | + | {{ContentCell|420px|[[TSA Mirage]]| |
[[Image:TSA_Mirage.jpg|x200px|link=TSA Mirage]]}} | [[Image:TSA_Mirage.jpg|x200px|link=TSA Mirage]]}} | ||
|} | |} | ||
{| style="display: inline-block" | {| style="display: inline-block" | ||
| − | {{ContentCell| | + | {{ContentCell|420px|[[TSA Palisades]]| |
[[Image:MWLL-_logo.png|x200px|link=TSA Palisades]]}} | [[Image:MWLL-_logo.png|x200px|link=TSA Palisades]]}} | ||
|} | |} | ||
{| style="display: inline-block" | {| style="display: inline-block" | ||
| − | {{ContentCell| | + | {{ContentCell|420px|[[TSA Sandblasted]]| |
[[Image:TSA_Sandblasted.jpg|x200px|link=TSA Sandblasted]]}} | [[Image:TSA_Sandblasted.jpg|x200px|link=TSA Sandblasted]]}} | ||
|} | |} | ||
{| style="display: inline-block" | {| style="display: inline-block" | ||
| − | {{ContentCell| | + | {{ContentCell|420px|[[TSA ThunderRift]]| |
[[Image:Thunder-Rift.jpg|x200px|link=TSA ThunderRift]]}} | [[Image:Thunder-Rift.jpg|x200px|link=TSA ThunderRift]]}} | ||
|} | |} | ||
| Line 156: | Line 156: | ||
<div style="width:95%; margin:auto; text-align: center; margin-top:10px; margin-bottom:30px"> | <div style="width:95%; margin:auto; text-align: center; margin-top:10px; margin-bottom:30px"> | ||
{| style="display: inline-block" | {| style="display: inline-block" | ||
| − | {{ContentCell| | + | {{ContentCell|420px|[[SA Gladiator]]| |
| − | [[Image: | + | [[Image:SA Gladiator1 crop.jpg|x200px|link=SA Gladiator]]}} |
|} | |} | ||
{| style="display: inline-block" | {| style="display: inline-block" | ||
| − | {{ContentCell| | + | {{ContentCell|420px|[[SA Glory]]| |
[[Image:SA_Glory.jpg|x200px|link=SA Glory]]}} | [[Image:SA_Glory.jpg|x200px|link=SA Glory]]}} | ||
|} | |} | ||
{| style="display: inline-block" | {| style="display: inline-block" | ||
| − | {{ContentCell| | + | {{ContentCell|420px|[[SA HelsGate]]| |
[[Image:SA_HelsGate.jpg|x200px|link=SA HelsGate]]}} | [[Image:SA_HelsGate.jpg|x200px|link=SA HelsGate]]}} | ||
|} | |} | ||
{| style="display: inline-block" | {| style="display: inline-block" | ||
| − | {{ContentCell| | + | {{ContentCell|420px|[[SA Jungle]]| |
[[Image:SA_Jungle.jpg|x200px|link=SA Jungle]]}} | [[Image:SA_Jungle.jpg|x200px|link=SA Jungle]]}} | ||
|} | |} | ||
{| style="display: inline-block" | {| style="display: inline-block" | ||
| − | {{ContentCell| | + | {{ContentCell|420px|[[SA Vista]]| |
[[Image:MWLL-_logo.png|x200px|link=SA Vista]]}} | [[Image:MWLL-_logo.png|x200px|link=SA Vista]]}} | ||
|} | |} | ||
| Line 188: | Line 188: | ||
<div style="width:95%; margin:auto; text-align: center; margin-top:10px; margin-bottom:30px> | <div style="width:95%; margin:auto; text-align: center; margin-top:10px; margin-bottom:30px> | ||
{| style="display: inline-block" | {| style="display: inline-block" | ||
| − | {{ContentCell| | + | {{ContentCell|420px|[[TC AcidKotH]]| |
[[Image:TC_AcidKotH-2_crop.jpg|x200px|link=TC AcidKotH]]}} | [[Image:TC_AcidKotH-2_crop.jpg|x200px|link=TC AcidKotH]]}} | ||
|} | |} | ||
{| style="display: inline-block" | {| style="display: inline-block" | ||
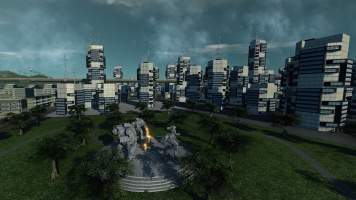
| − | {{ContentCell| | + | {{ContentCell|420px|[[TC CityTech]]| |
[[Image:TC CityTech1 crop.jpg|x200px|link=TC CityTech]]}} | [[Image:TC CityTech1 crop.jpg|x200px|link=TC CityTech]]}} | ||
|} | |} | ||
{| style="display: inline-block" | {| style="display: inline-block" | ||
| − | {{ContentCell| | + | {{ContentCell|420px|[[TC Desolation]]| |
[[Image:MWLL-_logo.png|x200px|link=TC Desolation]]}} | [[Image:MWLL-_logo.png|x200px|link=TC Desolation]]}} | ||
|} | |} | ||
{| style="display: inline-block" | {| style="display: inline-block" | ||
| − | {{ContentCell| | + | {{ContentCell|420px|[[TC NewAvalon]]| |
[[Image:TC_NewAvalon-1_crop.jpg|x200px|link=TC NewAvalon]]}} | [[Image:TC_NewAvalon-1_crop.jpg|x200px|link=TC NewAvalon]]}} | ||
|} | |} | ||
{| style="display: inline-block" | {| style="display: inline-block" | ||
| − | {{ContentCell| | + | {{ContentCell|420px|[[TC Phlegeton]]| |
[[Image:MWLL-_logo.png|x200px|link=TC Phlegeton]]}} | [[Image:MWLL-_logo.png|x200px|link=TC Phlegeton]]}} | ||
|} | |} | ||
{| style="display: inline-block" | {| style="display: inline-block" | ||
| − | {{ContentCell| | + | {{ContentCell|420px|[[TC Qandahar]]| |
[[Image:MWLL-_logo.png|x200px|link=TC Qandahar]]}} | [[Image:MWLL-_logo.png|x200px|link=TC Qandahar]]}} | ||
|} | |} | ||
{| style="display: inline-block" | {| style="display: inline-block" | ||
| − | {{ContentCell| | + | {{ContentCell|420px|[[TC RingOfFire]]| |
[[Image:TC RingOfFire6 crop.jpg|x200px|link=TC RingOfFire]]}} | [[Image:TC RingOfFire6 crop.jpg|x200px|link=TC RingOfFire]]}} | ||
|} | |} | ||
{| style="display: inline-block" | {| style="display: inline-block" | ||
| − | {{ContentCell| | + | {{ContentCell|420px|[[TC Urban Jungle]]| |
[[Image:TC_Urban_Jungle-4.jpg|x200px|link=TC Urban Jungle]]}} | [[Image:TC_Urban_Jungle-4.jpg|x200px|link=TC Urban Jungle]]}} | ||
|} | |} | ||
{| style="display: inline-block" | {| style="display: inline-block" | ||
| − | {{ContentCell| | + | {{ContentCell|420px|[[TC Warzone]]| |
[[Image:TC Warzone1 crop.jpg|x200px|link=TC Warzone]]}} | [[Image:TC Warzone1 crop.jpg|x200px|link=TC Warzone]]}} | ||
|} | |} | ||
{| style="display: inline-block" | {| style="display: inline-block" | ||
| − | {{ContentCell| | + | {{ContentCell|420px|[[TC Zoetermeer]]| |
[[Image:TC ZoetermeerV6-1 crop.jpg|x200px|link=TC Zoetermeer]]}} | [[Image:TC ZoetermeerV6-1 crop.jpg|x200px|link=TC Zoetermeer]]}} | ||
|} | |} | ||
<!-- | <!-- | ||
{| style="display: inline-block; text-align: left" | {| style="display: inline-block; text-align: left" | ||
| − | {{ContentCell| | + | {{ContentCell|420px|TC ParadiseLost| |
[[Image:MWLL-_logo.png|x200px|center|]] | [[Image:MWLL-_logo.png|x200px|center|]] | ||
* '''Description:''' | * '''Description:''' | ||
| Line 236: | Line 236: | ||
|} | |} | ||
{| style="display: inline-block; text-align: left" | {| style="display: inline-block; text-align: left" | ||
| − | {{ContentCell| | + | {{ContentCell|420px|TC StarLeagueCache| |
[[Image:MWLL-_logo.png|x200px|center|]] | [[Image:MWLL-_logo.png|x200px|center|]] | ||
* '''Description:''' Smaller map centered around an abandoned Star League cache | * '''Description:''' Smaller map centered around an abandoned Star League cache | ||
| Line 249: | Line 249: | ||
<div style="width:95%; margin:auto; text-align: center; margin-top:10px; margin-bottom:30px"> | <div style="width:95%; margin:auto; text-align: center; margin-top:10px; margin-bottom:30px"> | ||
{| style="display: inline-block; text-align: left" | {| style="display: inline-block; text-align: left" | ||
| − | {{ContentCell| | + | {{ContentCell|420px|TSA ArcticCanyon| |
[[Image:MWLL-_logo.png|x200px|center|]] | [[Image:MWLL-_logo.png|x200px|center|]] | ||
<!--* '''Description:''' --- | <!--* '''Description:''' --- | ||
| Line 257: | Line 257: | ||
|} | |} | ||
{| style="display: inline-block; text-align: left" | {| style="display: inline-block; text-align: left" | ||
| − | {{ContentCell| | + | {{ContentCell|420px|TSA TheFeralFangs| |
[[Image:MWLL-_logo.png|x200px|center|]] | [[Image:MWLL-_logo.png|x200px|center|]] | ||
<!--* '''Description:''' --- | <!--* '''Description:''' --- | ||
| Line 265: | Line 265: | ||
|} | |} | ||
{| style="display: inline-block; text-align: left;" | {| style="display: inline-block; text-align: left;" | ||
| − | {{ContentCell| | + | {{ContentCell|420px|TSA Gatorbait| |
[[Image:MWLL-_logo.png|x200px|center|]] | [[Image:MWLL-_logo.png|x200px|center|]] | ||
<!--* '''Description:''' An airfield on a large flat plateau surrounded by islands with connecting bridges, based off a ''MechWarrior 4'' map | <!--* '''Description:''' An airfield on a large flat plateau surrounded by islands with connecting bridges, based off a ''MechWarrior 4'' map | ||
| Line 279: | Line 279: | ||
<div style="width:95%; margin:auto; text-align: center; margin-top:10px; margin-bottom:30px"> | <div style="width:95%; margin:auto; text-align: center; margin-top:10px; margin-bottom:30px"> | ||
{| style="display: inline-block; text-align: left;" | {| style="display: inline-block; text-align: left;" | ||
| − | {{ContentCell| | + | {{ContentCell|420px|SA Alshain| |
[[Image:MWLL-_logo.png|x200px|center|]] | [[Image:MWLL-_logo.png|x200px|center|]] | ||
<!--* '''Description:''' In the icy peaks of the Polotmy Mountains, Clan Ghost Bear holds various trials along the slippery slopes | <!--* '''Description:''' In the icy peaks of the Polotmy Mountains, Clan Ghost Bear holds various trials along the slippery slopes | ||
| Line 287: | Line 287: | ||
|} | |} | ||
{| style="display: inline-block; text-align: left" | {| style="display: inline-block; text-align: left" | ||
| − | {{ContentCell| | + | {{ContentCell|420px|SA Coliseum| |
[[Image:MWLL-_logo.png|x200px|center|]] | [[Image:MWLL-_logo.png|x200px|center|]] | ||
<!--* '''Description:''' Thanks to its desolate desert local, the Coliseum is often described as the most brutal arena on the Solaris tour | <!--* '''Description:''' Thanks to its desolate desert local, the Coliseum is often described as the most brutal arena on the Solaris tour | ||
Revision as of 01:39, 7 September 2019
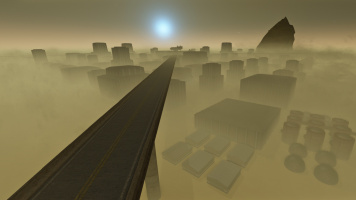
MWLL features a diverse group of Maps that offer new and interesting challenges for players to overcome while battling it out. The MWLL community has also contributed, producing incredibly well-made custom maps in the short time since the Beta released, increasing the number of maps further. There are currently five playable game modes, Team Solaris Arena, Test of Strength, Terrain Control, Solaris Arena and Last Man Standing. Because of the similarity between game modes, Team Solaris Arena and Test of Strength share maps, as do Solaris Arena and Last Man Standing. Additionaly Team Solaris Arena can also be played on all Terrain Control maps.
Contents
Official Maps
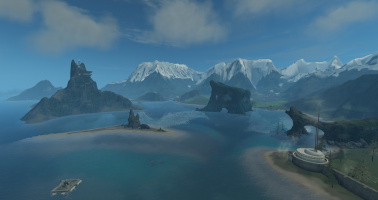
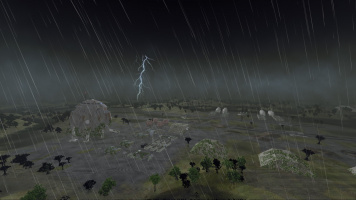
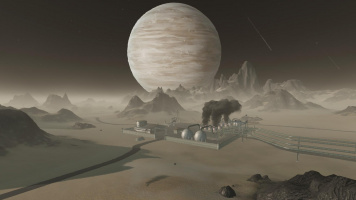
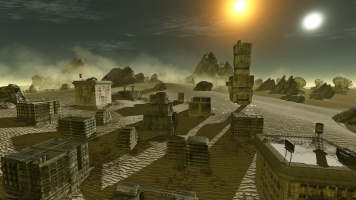
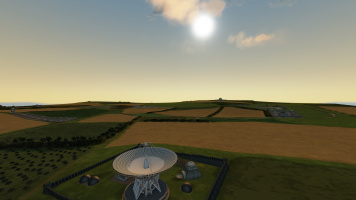
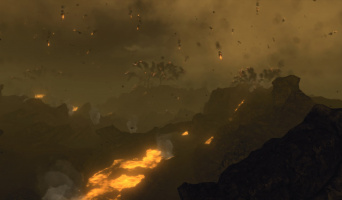
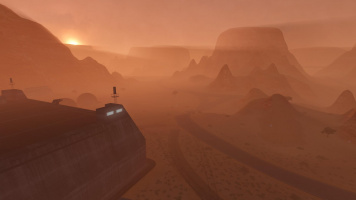
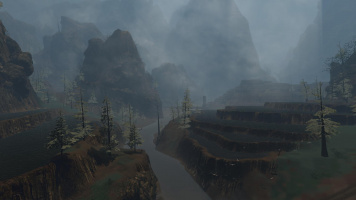
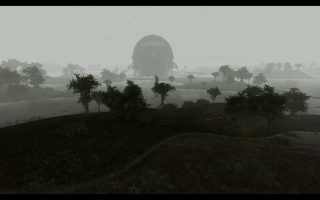
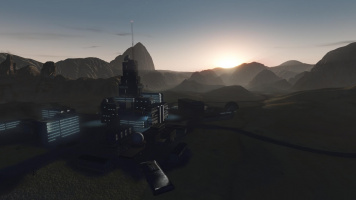
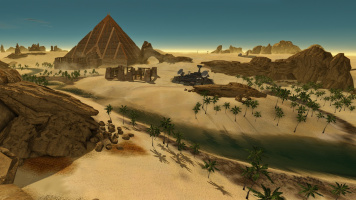
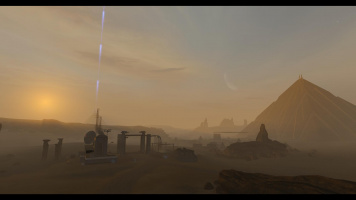
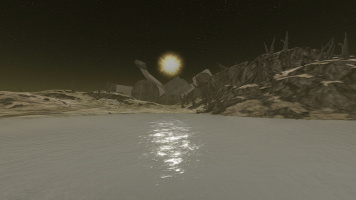
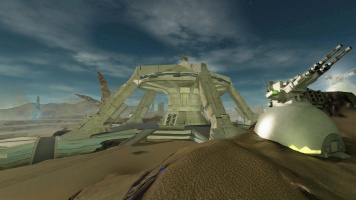
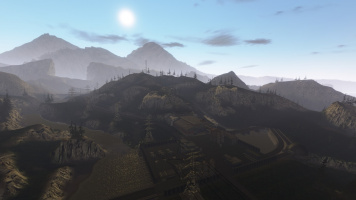
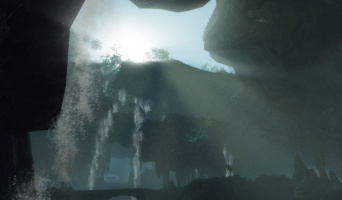
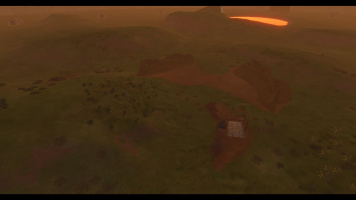
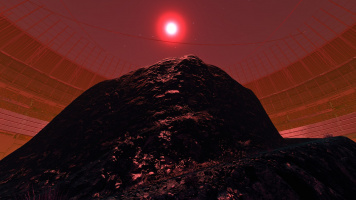
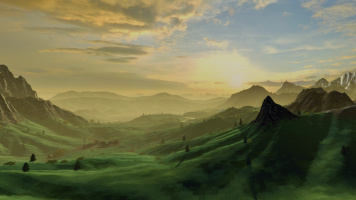
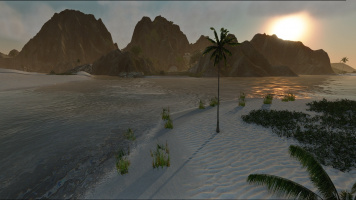
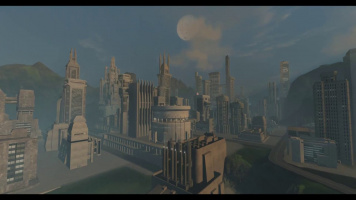
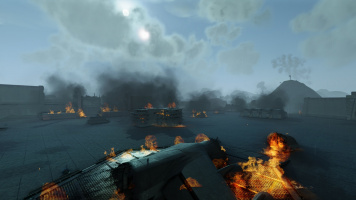
TC (Terrain Control) Maps:
|
|
|
|
|
|
|
|
|
|
|
|
|
|
|
|

|
|
|
|
|
|
|
|
|
TSA (Team Solaris Arena) Maps:
|
|
|
|
|
|
|
|
SA (Solaris Arena) Maps:
|
|
|
|
|
Community Maps
Community maps can be downloaded from here, which also offers links that can be used for the map autodownloader. To install them, simply download and unzip the archive into your MWLL/Games/Multiplayer directory. Some archives are packed differently and thus need to be extracted or copied into a different level of the game's directory tree as a result.
If you are interested in helping create new maps for the community please check out Map Editing and the Terrain Control Tutorial for Mappers.
Terrain Control Maps:
|
|
|
|
|
|
|
|
|
|
Team Solaris Arena Maps:
|
|
|
Solaris Arena Maps:
|
|
Creating Custom Maps
All Maps came to existence by the Sandbox2 editor. As of recently, it is shipped with the game. Those who are attempting to create new maps should begin with Map_Editing.