Difference between revisions of "TC IvoryTower"
m (→Overview) |
m (→Gallery: image links) |
||
| (14 intermediate revisions by 4 users not shown) | |||
| Line 1: | Line 1: | ||
| − | |||
| − | |||
{{Map| | {{Map| | ||
| Image = File:TC_IvoryTower.jpg | | Image = File:TC_IvoryTower.jpg | ||
| Name = TC_IvoryTower | | Name = TC_IvoryTower | ||
| Environment = Mountain | | Environment = Mountain | ||
| − | | Temperature = | + | | Temperature = 36°C |
| Planet = Twycross | | Planet = Twycross | ||
| Coords = | | Coords = | ||
| Line 22: | Line 20: | ||
| BaseCL = 2 | | BaseCL = 2 | ||
| BaseNtl = 5 | | BaseNtl = 5 | ||
| − | | Map = | + | | Map = TC_IvoryTower_minimap.jpg |
| + | |||
| + | | Clan_X = 275 | ||
| + | | Clan_Y = 115 | ||
| + | | Clan_Mech_1_X = 256 | ||
| + | | Clan_Mech_1_Y = 145 | ||
| + | | Clan_ASF_1_X = 308 | ||
| + | | Clan_ASF_1_Y = 79 | ||
| + | |||
| + | | IS_X = 20 | ||
| + | | IS_Y = 195 | ||
| + | | IS_Mech_1_X = 40 | ||
| + | | IS_Mech_1_Y = 174 | ||
| + | | IS_ASF_1_X = 16 | ||
| + | | IS_ASF_1_Y = 155 | ||
| + | |||
| + | | Neutral_Mech_1_X = 96 | ||
| + | | Neutral_Mech_1_Y = 120 | ||
| + | | Neutral_Mech_2_X = 183 | ||
| + | | Neutral_Mech_2_Y = 195 | ||
| + | |||
| + | | Neutral_Cap_1_X = 174 | ||
| + | | Neutral_Cap_1_Y = 107 | ||
| + | | Neutral_Cap_2_X = 157 | ||
| + | | Neutral_Cap_2_Y = 143 | ||
| + | | Neutral_Cap_3_X = 123 | ||
| + | | Neutral_Cap_3_Y = 189 | ||
}} | }} | ||
| Line 28: | Line 52: | ||
==Overview== | ==Overview== | ||
| − | This map is one of the bloodiest in the entire game, alongside [[TC_ThunderRift|Thunder Rift]]. The narrow canyons, short sightlines and bases at each capture zone make Ivory Tower very well-suited to brawlers, particularly for tanks. Jump-capable 'Mechs can open additional firing options by climbing onto the mesas and attacking down into opposing formations, however this can be fraught with risk as some mesas have absolutely no cover whatsoever. | + | This map is one of the bloodiest in the entire game, alongside [[TC_ThunderRift|Thunder Rift]]. The narrow canyons, short sightlines and bases at each capture zone make Ivory Tower very well-suited to brawlers, particularly for tanks. Jump-capable 'Mechs can open additional firing options by climbing onto the mesas and attacking down into opposing formations, however this can be fraught with risk as some mesas have absolutely no cover whatsoever. Heat can be an issue for hotter assets caught in a pitched firefight, though there should be enough cover to allow for cooling off as needed. [[Battle Armor]] can be effective in delaying tactics or harassment at each of the 1.5x capture zones, especially against 'Mechs without [[SRM]]s or other splash weapons. |
| − | + | There are a couple of tunnels that run under the mesas: one that runs north-south between E4-D4 and one going east-west between C4/D4 and C5/D5. These tunnels can allow for unexpected attacks, entrapments and escape routes. | |
| − | The forward hangars at D3 and E5 can only build up to 65t 'Mechs including [[Warhammer]]s and [[Nova Cat]]s. There are '''no''' places to repair any 'Mech not built at a forward factory away from your main base; this can render some assault 'Mechs and tanks somewhat impractical for combat unless you either play cautiously or choose to sacrifice yourself instead. | + | The forward hangars at D3 and E5 can only build up to 65t 'Mechs including [[Warhammer]]s and [[Nova Cat]]s. There are '''no''' places to repair any 'Mech not built at a forward factory away from your main base; this can render some assault 'Mechs and tanks somewhat impractical for combat unless you either play cautiously or choose to sacrifice yourself instead as walking back to repair may take too long. |
| − | + | Aerospace fighters can be deployed with good success on this map against teams that overcommit to brawling. Care should be taken to avoid strafing perpendicular to a canyon as you may slam into the canyon wall if you get too low to the ground and stay alert for [[Heavy Gauss]] or [[LBX20]]-equipped assets as they can kill you very easily. | |
| − | |||
| − | |||
| − | |||
| − | |||
| − | |||
| − | |||
| − | |||
| − | |||
| − | |||
| − | |||
| − | |||
| − | |||
| − | === | + | ==Bases== |
| − | + | <div style="margin-bottom:10px></div> | |
| − | + | <div style="-webkit-columns: 340px 3; -moz-columns: 340px 3; columns: 340px 3; font-size:0.95em; min-width:320px; white-space: nowrap"> | |
| − | |||
| − | |||
| − | |||
| − | == | + | <div style="-webkit-column-break-inside: avoid; page-break-inside: avoid; break-inside: avoid; padding:8px; border-style:solid; border-color:#3e3e3e; border-width:1px;> |
| − | '''Type:''' | + | <div style=" font-size: 1.2em; font-weight: bold; text-align: center; background-color: #2c2c2c;>C5</div> |
| − | '''Defenses:''' 2x [[Turrets# | + | *'''Type:''' neutral outpost |
| − | ''' | + | *'''Defenses:''' 2x [[Turrets#Sentinel|Sentinel]], 1x [[Turrets#Hawk Eye|Hawk Eye]] |
| − | '''Can build:''' | + | *'''Capture weight''': 1.5 |
| − | '''Services:''' | + | *'''Spawn''': Yes |
| + | *'''Can build:''' none | ||
| + | *'''Services:''' none</div> | ||
| − | == | + | <div style="-webkit-column-break-inside: avoid; page-break-inside: avoid; break-inside: avoid; margin-top:0.7em; padding:8px; border-style:solid; border-color:#3e3e3e; border-width:1px;> |
| − | '''Type:''' | + | <div style=" font-size: 1.2em; font-weight: bold; text-align: center; background-color: #2c2c2c;>C8</div> |
| − | '''Defenses:''' 1x [[Turrets# | + | *'''Type:''' [[Clan]] airfield |
| − | ''' | + | *'''Defenses:''' 2x [[Turrets#Calliope|Calliope]], 1x [[Turrets#Eagle Eye|Eagle Eye]] |
| − | '''Can build:''' | + | *'''Capture weight''': --- |
| − | '''Services:''' [[Repair]], [[Rearm]] | + | *'''Spawn''': Yes |
| + | *'''Can build:''' all [[ASF]] and [[VTOL]] | ||
| + | *'''Services:''' [[Repair]], [[Rearm]]</div> | ||
| − | == | + | <div style="-webkit-column-break-inside: avoid; page-break-inside: avoid; break-inside: avoid; margin-top:0.7em; padding:8px; border-style:solid; border-color:#3e3e3e; border-width:1px;> |
| − | '''Type:''' | + | <div style=" font-size: 1.2em; font-weight: bold; text-align: center; background-color: #2c2c2c;>D1</div> |
| − | '''Defenses:''' 2x [[Turrets# | + | *'''Type:''' [[IS]] airfield |
| − | ''' | + | *'''Defenses:''' 2x [[Turrets#Calliope|Calliope]], 1x [[Turrets#Eagle Eye|Eagle Eye]] |
| − | '''Can build:''' | + | *'''Capture weight''': --- |
| − | '''Services:''' | + | *'''Spawn''': Yes |
| + | *'''Can build:''' all [[ASF]] and [[VTOL]] | ||
| + | *'''Services:''' [[Repair]], [[Rearm]]</div> | ||
| − | ''' | + | <div style="-webkit-column-break-inside: avoid; page-break-inside: avoid; break-inside: avoid; margin-top:0.7em; padding:8px; border-style:solid; border-color:#3e3e3e; border-width:1px;> |
| + | <div style=" font-size: 1.2em; font-weight: bold; text-align: center; background-color: #2c2c2c;>D3</div> | ||
| + | *'''Type:''' neutral base | ||
| + | *'''Defenses:''' 1x [[Turrets#Sentinel|Sentinel]] | ||
| + | *'''Capture weight''': 1 | ||
| + | *'''Spawn''': Yes | ||
| + | *'''Can build:''' <span style="white-space: normal">≤65t [[Mechs]] and [[Vehicles]] (+[[Partisan]], [[Nova Cat]], [[Warhammer]])</span> | ||
| + | *'''Services:''' [[Repair]], [[Rearm]]</div> | ||
| − | == | + | <div style="-webkit-column-break-inside: avoid; page-break-inside: avoid; break-inside: avoid; margin-top:0.7em; padding:8px; border-style:solid; border-color:#3e3e3e; border-width:1px;> |
| − | '''Type:''' neutral | + | <div style=" font-size: 1.2em; font-weight: bold; text-align: center; background-color: #2c2c2c;>D4</div> |
| − | '''Defenses:''' none | + | *'''Type:''' neutral strategic point |
| − | ''' | + | *'''Defenses:''' none |
| − | '''Can build:''' none | + | *'''Capture weight''': 1.5 |
| − | '''Services:''' none | + | *'''Spawn''': Yes |
| + | *'''Can build:''' none | ||
| + | *'''Services:''' none</div> | ||
| − | ''' | + | <div style="-webkit-column-break-inside: avoid; page-break-inside: avoid; break-inside: avoid; margin-top:0.7em; padding:8px; border-style:solid; border-color:#3e3e3e; border-width:1px;> |
| + | <div style=" font-size: 1.2em; font-weight: bold; text-align: center; background-color: #2c2c2c;>D7</div> | ||
| + | *'''Type:''' [[Clan]] home base | ||
| + | *'''Defenses:''' 3x [[Turrets#Calliope|Calliope]], 2x [[Turrets#LAMS Turret|LAMS]] | ||
| + | *'''Capture weight''': --- | ||
| + | *'''Spawn''': Yes | ||
| + | *'''Can build:''' all [[Mechs]] and [[Vehicles]] | ||
| + | *'''Services:''' [[Repair]], [[Rearm]]</div> | ||
| − | == | + | <div style="-webkit-column-break-inside: avoid; page-break-inside: avoid; break-inside: avoid; margin-top:0.7em; padding:8px; border-style:solid; border-color:#3e3e3e; border-width:1px;> |
| − | '''Type:''' | + | <div style=" font-size: 1.2em; font-weight: bold; text-align: center; background-color: #2c2c2c;>E2</div> |
| − | '''Defenses:''' | + | *'''Type:''' [[IS]] home base |
| − | ''' | + | *'''Defenses:''' 3x [[Turrets#Calliope|Calliope]], 2x [[Turrets#LAMS Turret|LAMS]] |
| − | '''Can build:''' | + | *'''Capture weight''': --- |
| − | '''Services:''' | + | *'''Spawn''': Yes |
| + | *'''Can build:''' all [[Mechs]] and [[Vehicles]] | ||
| + | *'''Services:''' [[Repair]], [[Rearm]]</div> | ||
| − | ''' | + | <div style="-webkit-column-break-inside: avoid; page-break-inside: avoid; break-inside: avoid; margin-top:0.7em; padding:8px; border-style:solid; border-color:#3e3e3e; border-width:1px;> |
| + | <div style=" font-size: 1.2em; font-weight: bold; text-align: center; background-color: #2c2c2c;>E4</div> | ||
| + | *'''Type:''' neutral outpost | ||
| + | *'''Defenses:''' 2x [[Turrets#Sentinel|Sentinel]], 1x [[Turrets#Hawk Eye|Hawk Eye]] | ||
| + | *'''Capture weight''': 1.5 | ||
| + | *'''Spawn''': Yes | ||
| + | *'''Can build:''' none | ||
| + | *'''Services:''' none</div> | ||
| − | == | + | <div style="-webkit-column-break-inside: avoid; page-break-inside: avoid; break-inside: avoid; margin-top:0.7em; padding:8px; border-style:solid; border-color:#3e3e3e; border-width:1px;> |
| − | '''Type:''' neutral base | + | <div style=" font-size: 1.2em; font-weight: bold; text-align: center; background-color: #2c2c2c;>E5</div> |
| − | '''Defenses:''' 1x [[Turrets#Sentinel|Sentinel]] | + | *'''Type:''' neutral base |
| − | ''' | + | *'''Defenses:''' 1x [[Turrets#Sentinel|Sentinel]] |
| − | '''Can build:''' | + | *'''Capture weight''': 1 |
| − | '''Services:''' [[Repair]], [[Rearm]] | + | *'''Spawn''': Yes |
| + | *'''Can build:''' <span style="white-space: normal">≤65t [[Mechs]] and [[Vehicles]] (+[[Partisan]], [[Nova Cat]], [[Warhammer]])</span> | ||
| + | *'''Services:''' [[Repair]], [[Rearm]]</div> | ||
| + | </div> | ||
| + | {{Clear}} | ||
| − | == | + | ==Gallery== |
| + | <gallery mode="slideshow" showthumbnails heights=50px style="display: block; margin-top:3px; margin-left:2%; margin-right:2%; text-align: center; font-size:18px; padding:0px;"> | ||
| + | File:TC_IvoryTower2.jpg|link={{filepath:TC_IvoryTower2.jpg}} | ||
| + | File:TC_IvoryTower3.jpg|link={{filepath:TC_IvoryTower3.jpg}} | ||
| + | File:TC_IvoryTower4.jpg|link={{filepath:TC_IvoryTower4.jpg}} | ||
| + | File:TC_IvoryTower5.jpg|link={{filepath:TC_IvoryTower5.jpg}} | ||
| + | File:TC_IvoryTower6.jpg|link={{filepath:TC_IvoryTower6.jpg}} | ||
| + | File:TC_IvoryTower7.jpg|link={{filepath:TC_IvoryTower7.jpg}} | ||
| + | File:TC_IvoryTower8.jpg|link={{filepath:TC_IvoryTower8.jpg}} | ||
| + | File:TC_IvoryTower9.jpg|link={{filepath:TC_IvoryTower9.jpg}} | ||
| + | </gallery> | ||
{{Navbox Maps}} | {{Navbox Maps}} | ||
| − | + | [[Category:Official Maps]] | |
[[Category:Maps]] | [[Category:Maps]] | ||
Latest revision as of 17:12, 11 September 2019
| TC IvoryTower | ||
|---|---|---|

| ||
| Environment: | Mountain | |
| Temperature: | 36°C | |
| Planet: | Twycross | |
| Game Modes: | ||
| First Available In: | 0.6.0 | |
| Assets | ||
| Assets: | ||
| Number of Bases: | IS: 2 Clan: 2 Neutral: 5 | |
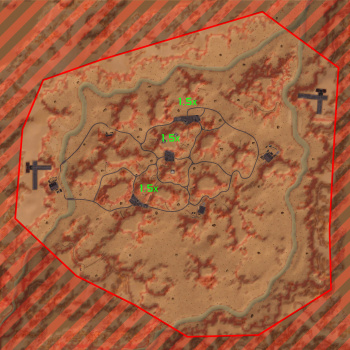
| Tactical Map | ||
  | ||
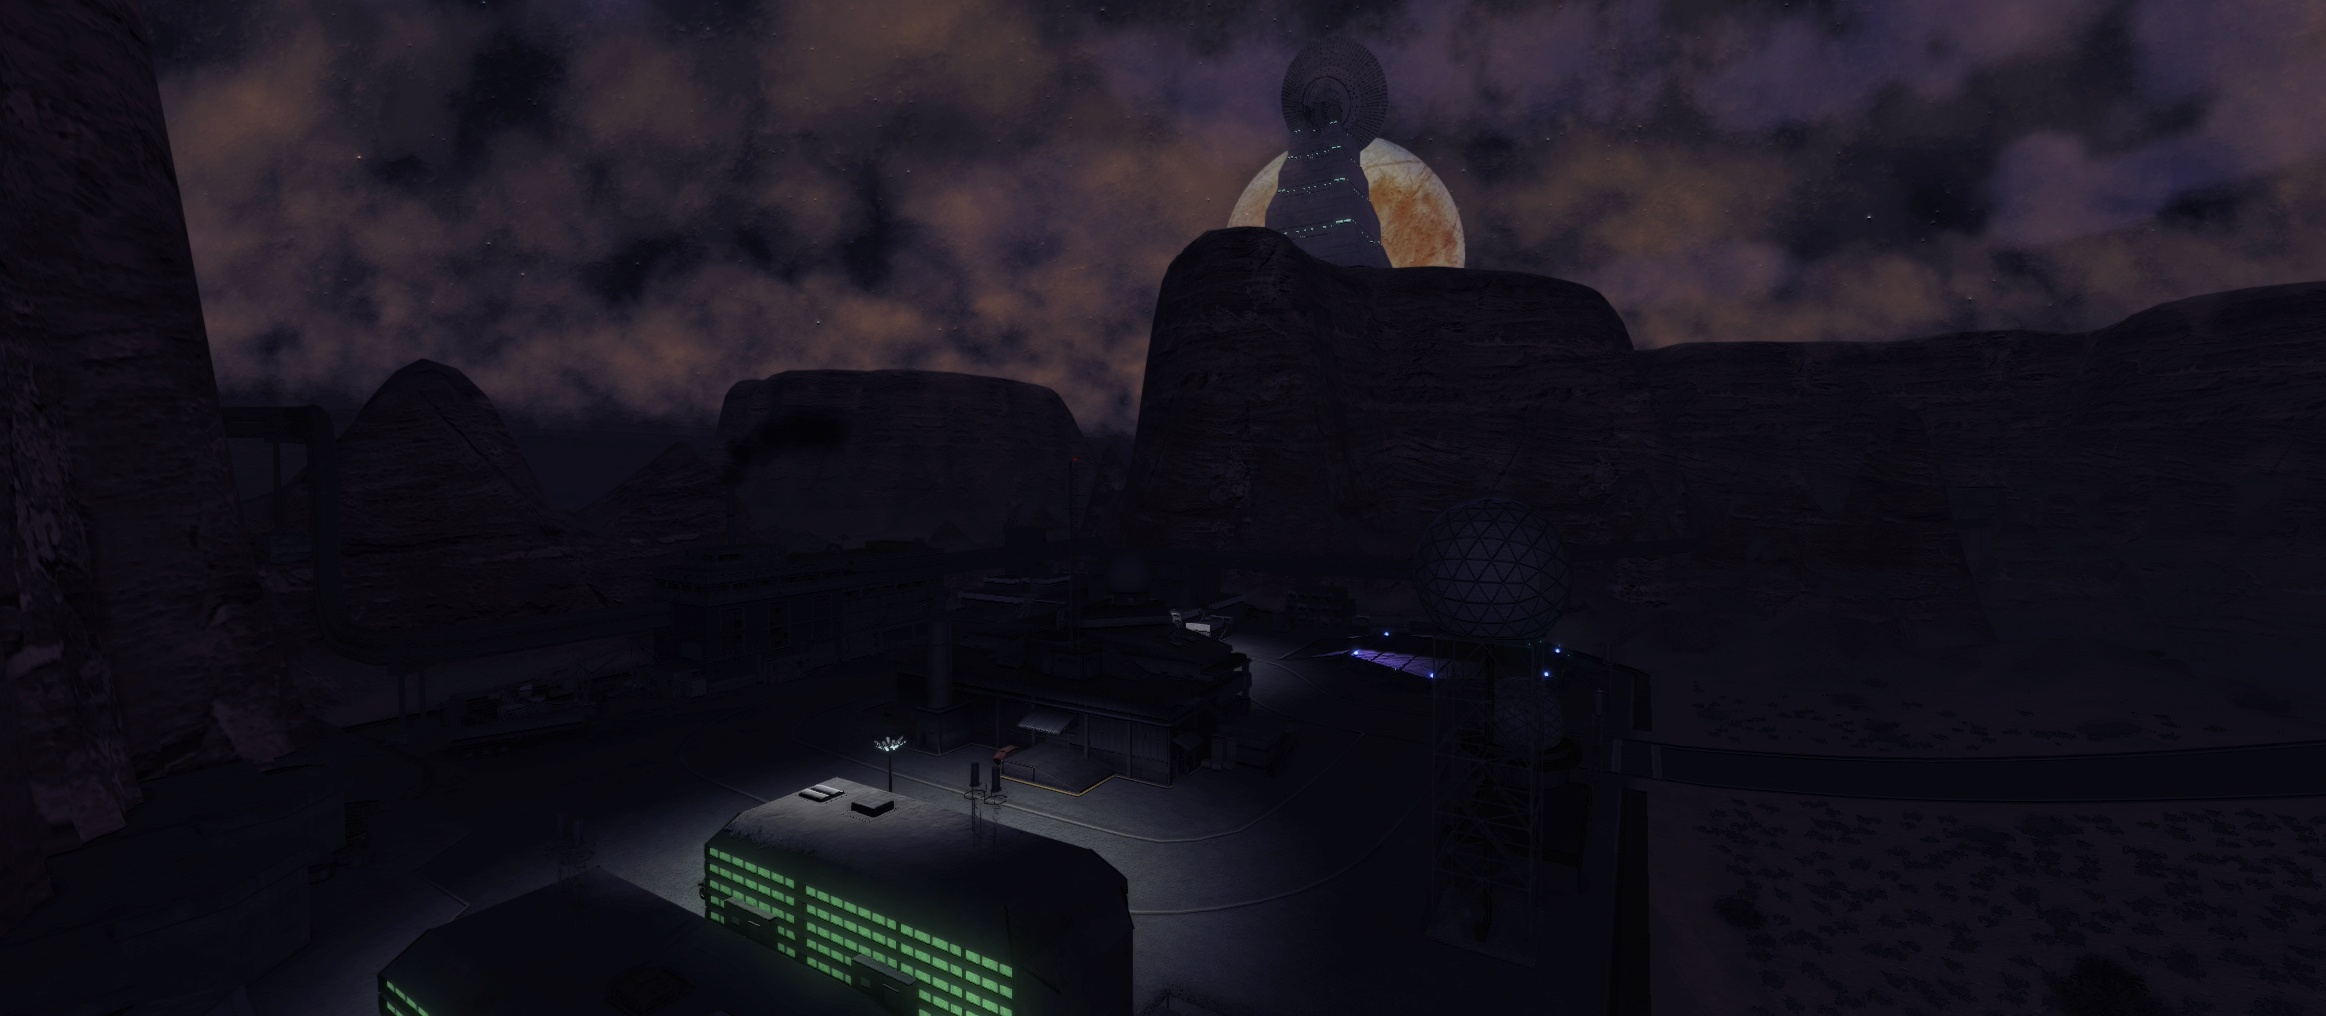
| "The 10th Lyran Guards and 9th FedCom RCT face off against the Jade Falcon Guards for control over this desert planet. They battle through the great canyons for control over strategic objectives such as the Ivory Towers, massive constructions seated within an industrial complex." |
| — Map introduction |
Overview
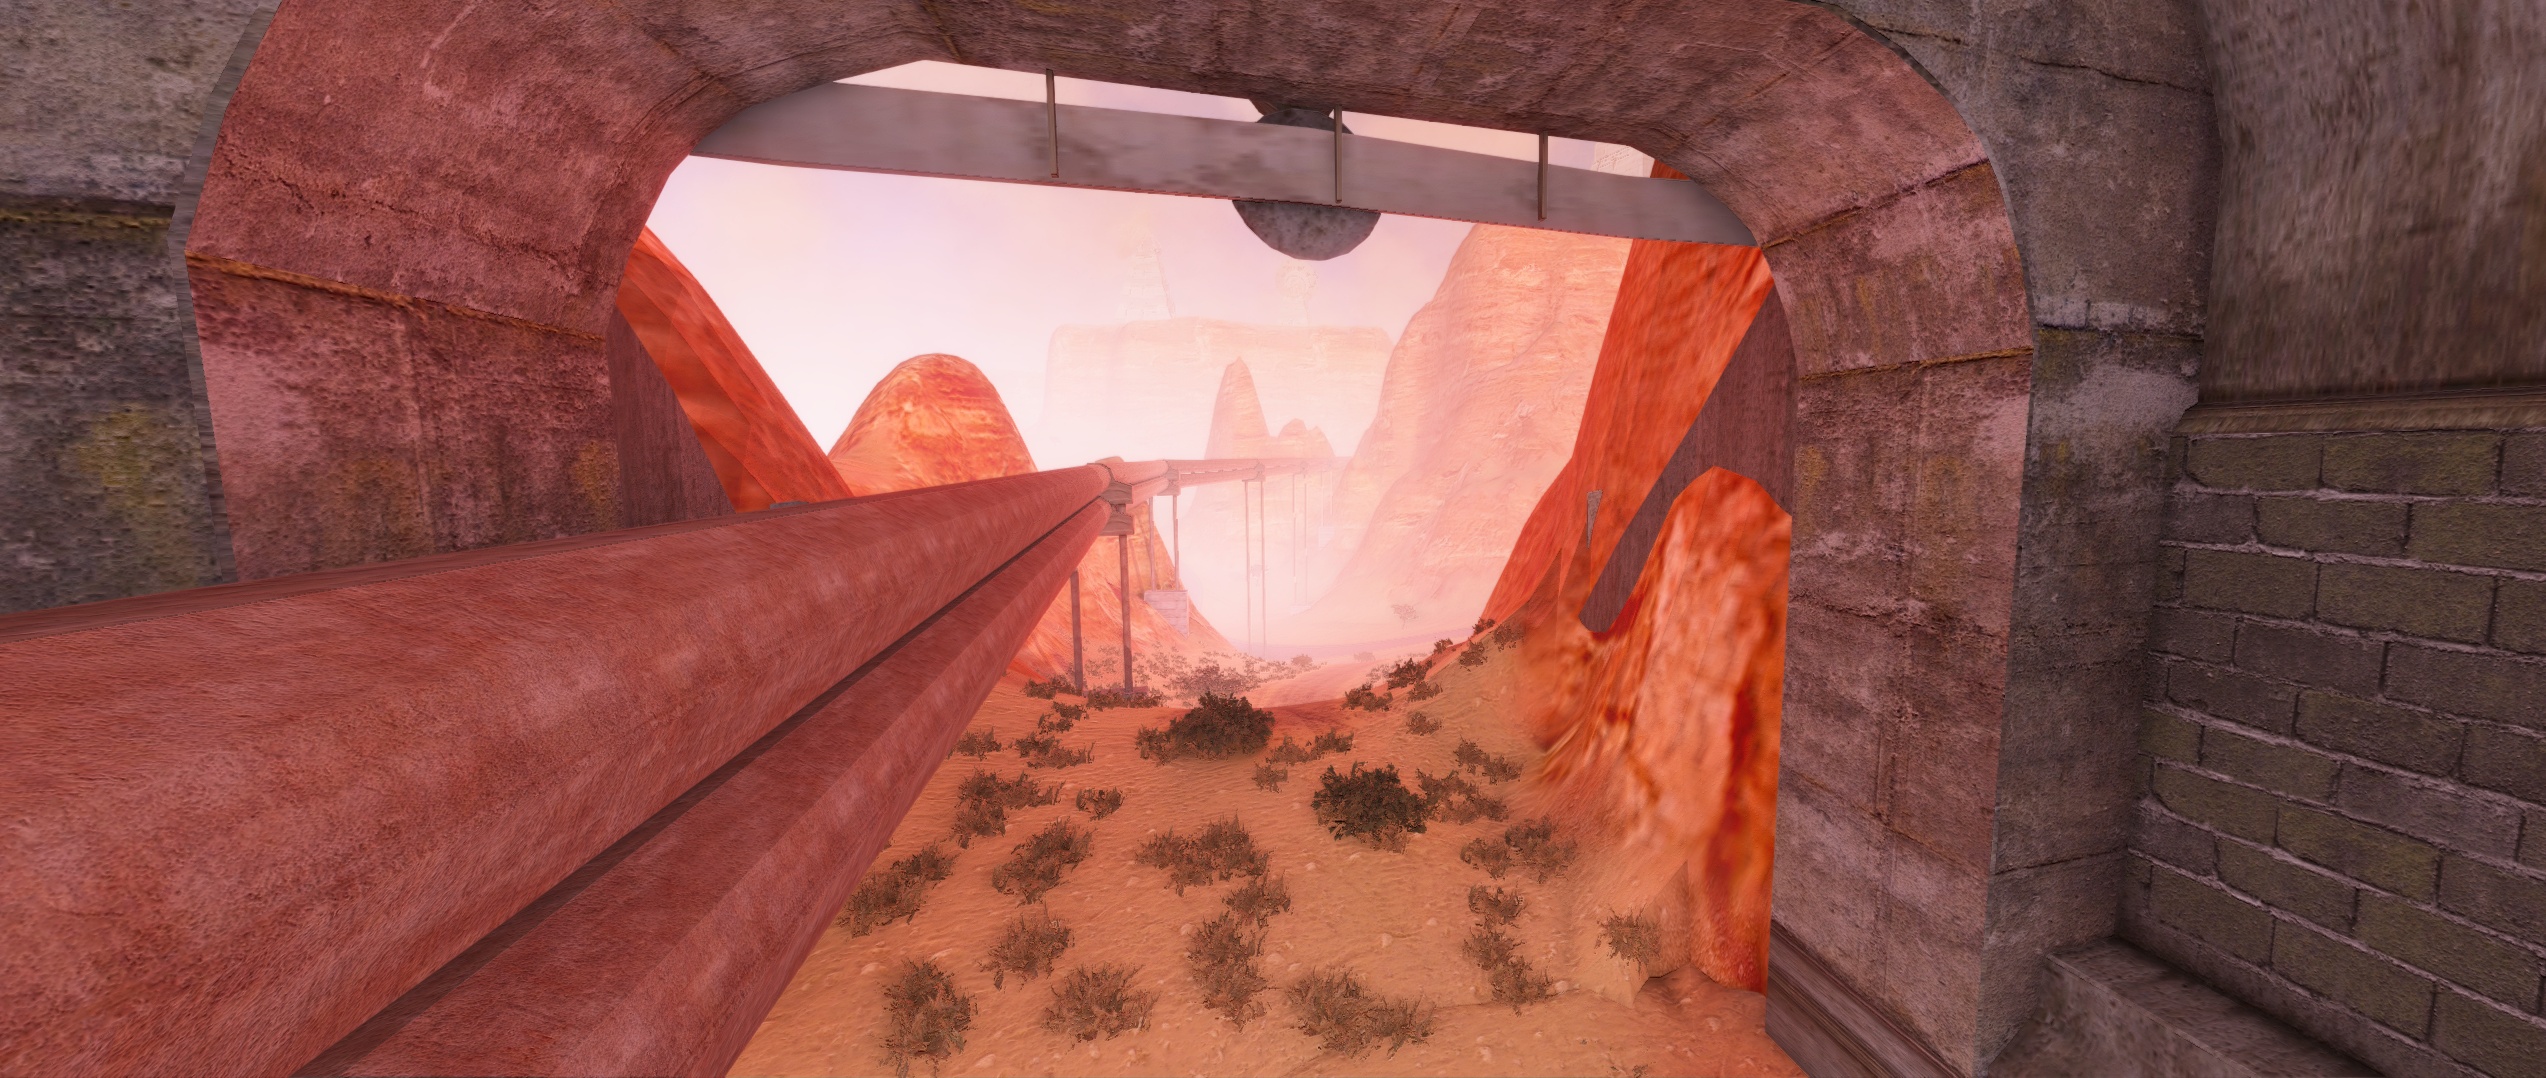
This map is one of the bloodiest in the entire game, alongside Thunder Rift. The narrow canyons, short sightlines and bases at each capture zone make Ivory Tower very well-suited to brawlers, particularly for tanks. Jump-capable 'Mechs can open additional firing options by climbing onto the mesas and attacking down into opposing formations, however this can be fraught with risk as some mesas have absolutely no cover whatsoever. Heat can be an issue for hotter assets caught in a pitched firefight, though there should be enough cover to allow for cooling off as needed. Battle Armor can be effective in delaying tactics or harassment at each of the 1.5x capture zones, especially against 'Mechs without SRMs or other splash weapons.
There are a couple of tunnels that run under the mesas: one that runs north-south between E4-D4 and one going east-west between C4/D4 and C5/D5. These tunnels can allow for unexpected attacks, entrapments and escape routes.
The forward hangars at D3 and E5 can only build up to 65t 'Mechs including Warhammers and Nova Cats. There are no places to repair any 'Mech not built at a forward factory away from your main base; this can render some assault 'Mechs and tanks somewhat impractical for combat unless you either play cautiously or choose to sacrifice yourself instead as walking back to repair may take too long.
Aerospace fighters can be deployed with good success on this map against teams that overcommit to brawling. Care should be taken to avoid strafing perpendicular to a canyon as you may slam into the canyon wall if you get too low to the ground and stay alert for Heavy Gauss or LBX20-equipped assets as they can kill you very easily.
Bases
- Type: neutral strategic point
- Defenses: none
- Capture weight: 1.5
- Spawn: Yes
- Can build: none
- Services: none