Difference between revisions of "TC Inferno"
m (→Overview) |
|||
| (17 intermediate revisions by 5 users not shown) | |||
| Line 1: | Line 1: | ||
| − | |||
| − | |||
{{Map| | {{Map| | ||
| Image = File:SA_Inferno.jpg | | Image = File:SA_Inferno.jpg | ||
| Name = TC_Inferno | | Name = TC_Inferno | ||
| + | | Created By = Sannyasi | ||
| Environment = Volcanic | | Environment = Volcanic | ||
| − | | Temperature = | + | | Temperature = 225°C ([[Conductivity]] 1) |
| Planet = Satalice | | Planet = Satalice | ||
| Coords = 6.00, 263.15 | | Coords = 6.00, 263.15 | ||
| Line 22: | Line 21: | ||
| BaseCL = 1 | | BaseCL = 1 | ||
| BaseNtl = 5 | | BaseNtl = 5 | ||
| − | | Map = | + | | Map = TC_Inferno_minimap.jpg |
| + | |||
| + | | Clan_X = 132 | ||
| + | | Clan_Y = 15 | ||
| + | | Clan_Mech_1_X = 158 | ||
| + | | Clan_Mech_1_Y = 26 | ||
| + | | Clan_ASF_1_X = 155 | ||
| + | | Clan_ASF_1_Y = 36 | ||
| + | |||
| + | | IS_X = 121 | ||
| + | | IS_Y = 315 | ||
| + | | IS_Mech_1_X = 141 | ||
| + | | IS_Mech_1_Y = 297 | ||
| + | | IS_ASF_1_X = 147 | ||
| + | | IS_ASF_1_Y = 289 | ||
| + | |||
| + | | Neutral_Mech_1_X = 69 | ||
| + | | Neutral_Mech_1_Y = 161 | ||
| + | | Neutral_Mech_2_X = 257 | ||
| + | | Neutral_Mech_2_Y = 179 | ||
| + | |||
| + | | Neutral_Cap_1_X = 187 | ||
| + | | Neutral_Cap_1_Y = 97 | ||
| + | | Neutral_Cap_2_X = 160 | ||
| + | | Neutral_Cap_2_Y = 167 | ||
| + | | Neutral_Cap_3_X = 122 | ||
| + | | Neutral_Cap_3_Y = 226 | ||
}} | }} | ||
| Line 28: | Line 53: | ||
==Overview== | ==Overview== | ||
| − | If you like it hot, this is the map for you. Inferno features the highest [[heat]] floor of any map in the game at a staggering 225 degrees. Assets with loadouts that cause sharp heat spikes are often unusable, and even some cooler-running assets will struggle with the reduced heat capacity available. A very important thing to note is that while the heat floor is very high, heat dissipation is '''not''' impacted | + | If you like it hot, this is the map for you. Inferno features the highest [[heat]] floor of any map in the game at a staggering 225 degrees. Assets with loadouts that cause sharp heat spikes are often unusable, and even some cooler-running assets will struggle with the reduced heat capacity available. A very important thing to note is that while the heat floor is very high, heat dissipation is '''not''' impacted signficantly. Your heat sinks will work largely as they would on most other maps. Flamers are very popular on Inferno and can be quite effective when deployed in a large brawl. |
| − | The map features numerous lava pools and flows, which will rapidly overheat your asset and kill you should you fall into them. Use the map and zoom in if you are still learning the map's layout as it can save you from a frustrating death in this manner. | + | The map features numerous lava pools and flows, which will rapidly overheat your asset and kill you should you fall into them. Don't use any coolant while in the [[lava]]. It will cause you to heat up even faster. Use the map and zoom in if you are still learning the map's layout as it can save you from a frustrating death in this manner. |
| − | Inferno is a very center-based map, due to the 3.0x capture zone at the central caldera. This capture zone is effectively shaped like a large donut, meaning that the entire caldera must be clear of opposing players in order to flip the zone. The size of the capture zone allows for stalling/blocking tactics not commonly found on other maps, especially with [[Battle Armor]]. | + | Inferno is a very center-based map, due to the 3.0x capture zone at the central caldera. This capture zone is effectively shaped like a large donut, meaning that the entire caldera must be clear of opposing players in order to flip the zone. The size of the capture zone allows for stalling/blocking tactics not commonly found on other maps, especially with [[Battle Armor]]. Brawls are frequent, though sniping from the high ground using [[Gauss Rifle]]s is an effective tactic too. |
| − | The side bases on Inferno | + | The side bases on Inferno, which only allow buying & repairing up to 65t 'Mechs plus the [[Warhammer]] and [[Nova Cat]], are still critical to hold as they are closer to the center cap zone than the main mech bays. Repair bays can be found at C5 and F4, however your team will have to supply an [[APC]] to enable reloading ammo at these locations. |
==Bases== | ==Bases== | ||
| − | ===A4/B4 | + | <div style="margin-bottom:10px></div> |
| − | '''Type:''' [[Clan]] home base | + | <div style="-webkit-columns: 340px 3; -moz-columns: 340px 3; columns: 340px 3; font-size:0.95em; min-width:325px; white-space: nowrap"> |
| − | '''Defenses:''' 2x [[Turrets#LAMS Turret|LAMS]], 4x [[Turrets#Calliope|Calliope]], 1x [[Turrets#Eagle Eye|Eagle Eye]] | + | |
| − | ''' | + | <div style="-webkit-column-break-inside: avoid; page-break-inside: avoid; break-inside: avoid; padding:8px; border-style:solid; border-color:#3e3e3e; border-width:1px;> |
| − | '''Can build:''' all [[Mechs]], | + | <div style=" font-size: 1.2em; font-weight: bold; text-align: center; background-color: #2c2c2c;>A4 / B4</div> |
| − | '''Services:''' [[Repair]], [[Rearm]] | + | *'''Type:''' [[Clan]] home base |
| + | *'''Defenses:''' 2x [[Turrets#LAMS Turret|LAMS]], 4x [[Turrets#Calliope|Calliope]], 1x [[Turrets#Eagle Eye|Eagle Eye]] | ||
| + | *'''Capture weight''': --- | ||
| + | *'''Spawn''': Yes | ||
| + | *'''Can build:''' all [[Mechs]], [[Vehicles]], [[ASF]]s and [[VTOL]]s | ||
| + | *'''Services:''' [[Repair]], [[Rearm]]</div> | ||
| − | == | + | <div style="-webkit-column-break-inside: avoid; page-break-inside: avoid; break-inside: avoid; margin-top:0.7em; padding:8px; border-style:solid; border-color:#3e3e3e; border-width:1px;> |
| − | '''Type:''' | + | <div style=" font-size: 1.2em; font-weight: bold; text-align: center; background-color: #2c2c2c;>C5</div> |
| − | '''Defenses:''' 2x [[Turrets# | + | *'''Type:''' neutral outpost |
| − | ''' | + | *'''Defenses:''' 2x [[Turrets#Hawk Eye|Hawk Eye]] |
| − | '''Can build:''' | + | *'''Capture weight''': 1 |
| − | '''Services:''' [[Repair]] | + | *'''Spawn''': Yes |
| + | *'''Can build:''' none | ||
| + | *'''Services:''' [[Repair]]</div> | ||
| − | == | + | <div style="-webkit-column-break-inside: avoid; page-break-inside: avoid; break-inside: avoid; margin-top:0.7em; padding:8px; border-style:solid; border-color:#3e3e3e; border-width:1px;> |
| − | '''Type:''' neutral base | + | <div style=" font-size: 1.2em; font-weight: bold; text-align: center; background-color: #2c2c2c;>D2</div> |
| − | '''Defenses:''' | + | *'''Type:''' neutral base |
| − | ''' | + | *'''Defenses:''' 2x [[Turrets#Sentinel|Sentinel]] |
| − | '''Can build:''' | + | *'''Capture weight''': 1 |
| − | '''Services:''' [[Repair]] | + | *'''Spawn''': Yes |
| + | *'''Can build:''' <span style="white-space: normal">≤65t [[Mechs]] and [[Vehicles]] (+[[Partisan]], [[Nova Cat]], [[Warhammer]])</span> | ||
| + | *'''Services:''' [[Repair]], [[Rearm]]</div> | ||
| − | == | + | <div style="-webkit-column-break-inside: avoid; page-break-inside: avoid; break-inside: avoid; margin-top:0.7em; padding:8px; border-style:solid; border-color:#3e3e3e; border-width:1px;> |
| − | '''Type:''' neutral | + | <div style=" font-size: 1.2em; font-weight: bold; text-align: center; background-color: #2c2c2c;>E4</div> |
| − | '''Defenses:''' | + | *'''Type:''' neutral strategic point |
| − | ''' | + | *'''Defenses:''' none |
| − | '''Can build:''' | + | *'''Capture weight''': 3 |
| − | '''Services:''' | + | *'''Spawn''': Yes |
| + | *'''Can build:''' none | ||
| + | *'''Services:''' none</div> | ||
| − | == | + | <div style="-webkit-column-break-inside: avoid; page-break-inside: avoid; break-inside: avoid; margin-top:0.7em; padding:8px; border-style:solid; border-color:#3e3e3e; border-width:1px;> |
| − | '''Type:''' neutral base | + | <div style=" font-size: 1.2em; font-weight: bold; text-align: center; background-color: #2c2c2c;>E7</div> |
| − | '''Defenses:''' | + | *'''Type:''' neutral base |
| − | ''' | + | *'''Defenses:''' 2x [[Turrets#Sentinel|Sentinel]] |
| − | '''Can build:''' | + | *'''Capture weight''': 1 |
| − | '''Services:''' | + | *'''Spawn''': Yes |
| + | *'''Can build:''' <span style="white-space: normal">≤65t [[Mechs]] and [[Vehicles]] (+[[Partisan]], [[Nova Cat]], [[Warhammer]])</span> | ||
| + | *'''Services:''' [[Repair]], [[Rearm]]</div> | ||
| − | ''' | + | <div style="-webkit-column-break-inside: avoid; page-break-inside: avoid; break-inside: avoid; margin-top:0.7em; padding:8px; border-style:solid; border-color:#3e3e3e; border-width:1px;> |
| + | <div style=" font-size: 1.2em; font-weight: bold; text-align: center; background-color: #2c2c2c;>F4</div> | ||
| + | *'''Type:''' neutral outpost | ||
| + | *'''Defenses:''' 2x [[Turrets#Hawk Eye|Hawk Eye]] | ||
| + | *'''Capture weight''': 1 | ||
| + | *'''Spawn''': Yes | ||
| + | *'''Can build:''' none | ||
| + | *'''Services:''' [[Repair]]</div> | ||
| − | == | + | <div style="-webkit-column-break-inside: avoid; page-break-inside: avoid; break-inside: avoid; margin-top:0.7em; padding:8px; border-style:solid; border-color:#3e3e3e; border-width:1px;> |
| − | '''Type:''' | + | <div style=" font-size: 1.2em; font-weight: bold; text-align: center; background-color: #2c2c2c;>G4 / H4</div> |
| − | '''Defenses:''' 2x [[Turrets# | + | *'''Type:''' [[IS]] home base |
| − | ''' | + | *'''Defenses:''' 2x [[Turrets#LAMS Turret|LAMS]], 4x [[Turrets#Calliope|Calliope]], 1x [[Turrets#Eagle Eye|Eagle Eye]] |
| − | '''Can build:''' | + | *'''Capture weight''': --- |
| − | '''Services:''' [[Repair]] | + | *'''Spawn''': Yes |
| + | *'''Can build:''' all [[Mechs]], [[Vehicles]], [[ASF]]s and [[VTOL]]s | ||
| + | *'''Services:''' [[Repair]], [[Rearm]]</div> | ||
| + | </div> | ||
| − | + | {{Clear}} | |
| − | |||
| − | |||
| − | |||
| − | |||
| − | |||
| − | == | + | ==Gallery== |
| + | <gallery mode="slideshow" showthumbnails heights=50px style="display: block; margin-top:3px; margin-left:2%; margin-right:2%; text-align: center; font-size:18px; padding:0px;"> | ||
| + | File:TC_Inferno1.jpg|link={{filepath:TC_Inferno1.jpg}} | ||
| + | File:TC_Inferno2.jpg|link={{filepath:TC_Inferno2.jpg}} | ||
| + | File:TC_Inferno3.jpg|link={{filepath:TC_Inferno3.jpg}} | ||
| + | File:TC_Inferno4.jpg|link={{filepath:TC_Inferno4.jpg}} | ||
| + | File:TC_Inferno5.jpg|link={{filepath:TC_Inferno5.jpg}} | ||
| + | File:TC_Inferno6.jpg|link={{filepath:TC_Inferno6.jpg}} | ||
| + | File:TC_Inferno7.jpg|link={{filepath:TC_Inferno7.jpg}} | ||
| + | File:TC_Inferno8.jpg|link={{filepath:TC_Inferno8.jpg}} | ||
| + | File:TC_Inferno9.jpg|link={{filepath:TC_Inferno9.jpg}} | ||
| + | </gallery> | ||
| + | {{Navbox Maps}} | ||
| + | [[Category:Official Maps]] | ||
[[Category:Maps]] | [[Category:Maps]] | ||
Latest revision as of 09:26, 18 January 2023
| TC Inferno | ||
|---|---|---|
| ||
| Created By: | Sannyasi | |
| Environment: | Volcanic | |
| Temperature: | 225°C (Conductivity 1) | |
| Planet: | Satalice | |
| Coords: | 6.00, 263.15 | |
| Size: | 4096 x 4096 | |
| Game Modes: | ||
| First Available In: | 0.6.0 | |
| Assets | ||
| Assets: | ||
| Number of Bases: | IS: 1 Clan: 1 Neutral: 5 | |
| Tactical Map | ||
 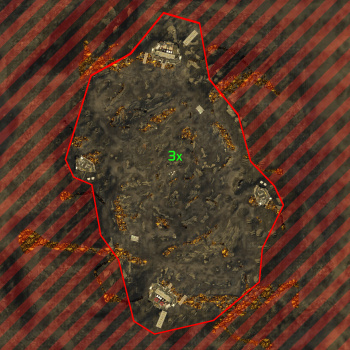 | ||
| "When Clan Wolf clusters invaded Satalice, Oeverste MacGalliard used guerrilla tactics in an attempt to disorganize the clanners. This strategy was thwarted by Clan aerospace supremacy, reducing mobility and leaving no place to hide. Recent volcanic activity has turned the terrain into a unique and unforgiving battlefield." |
| — Map introduction |
Overview
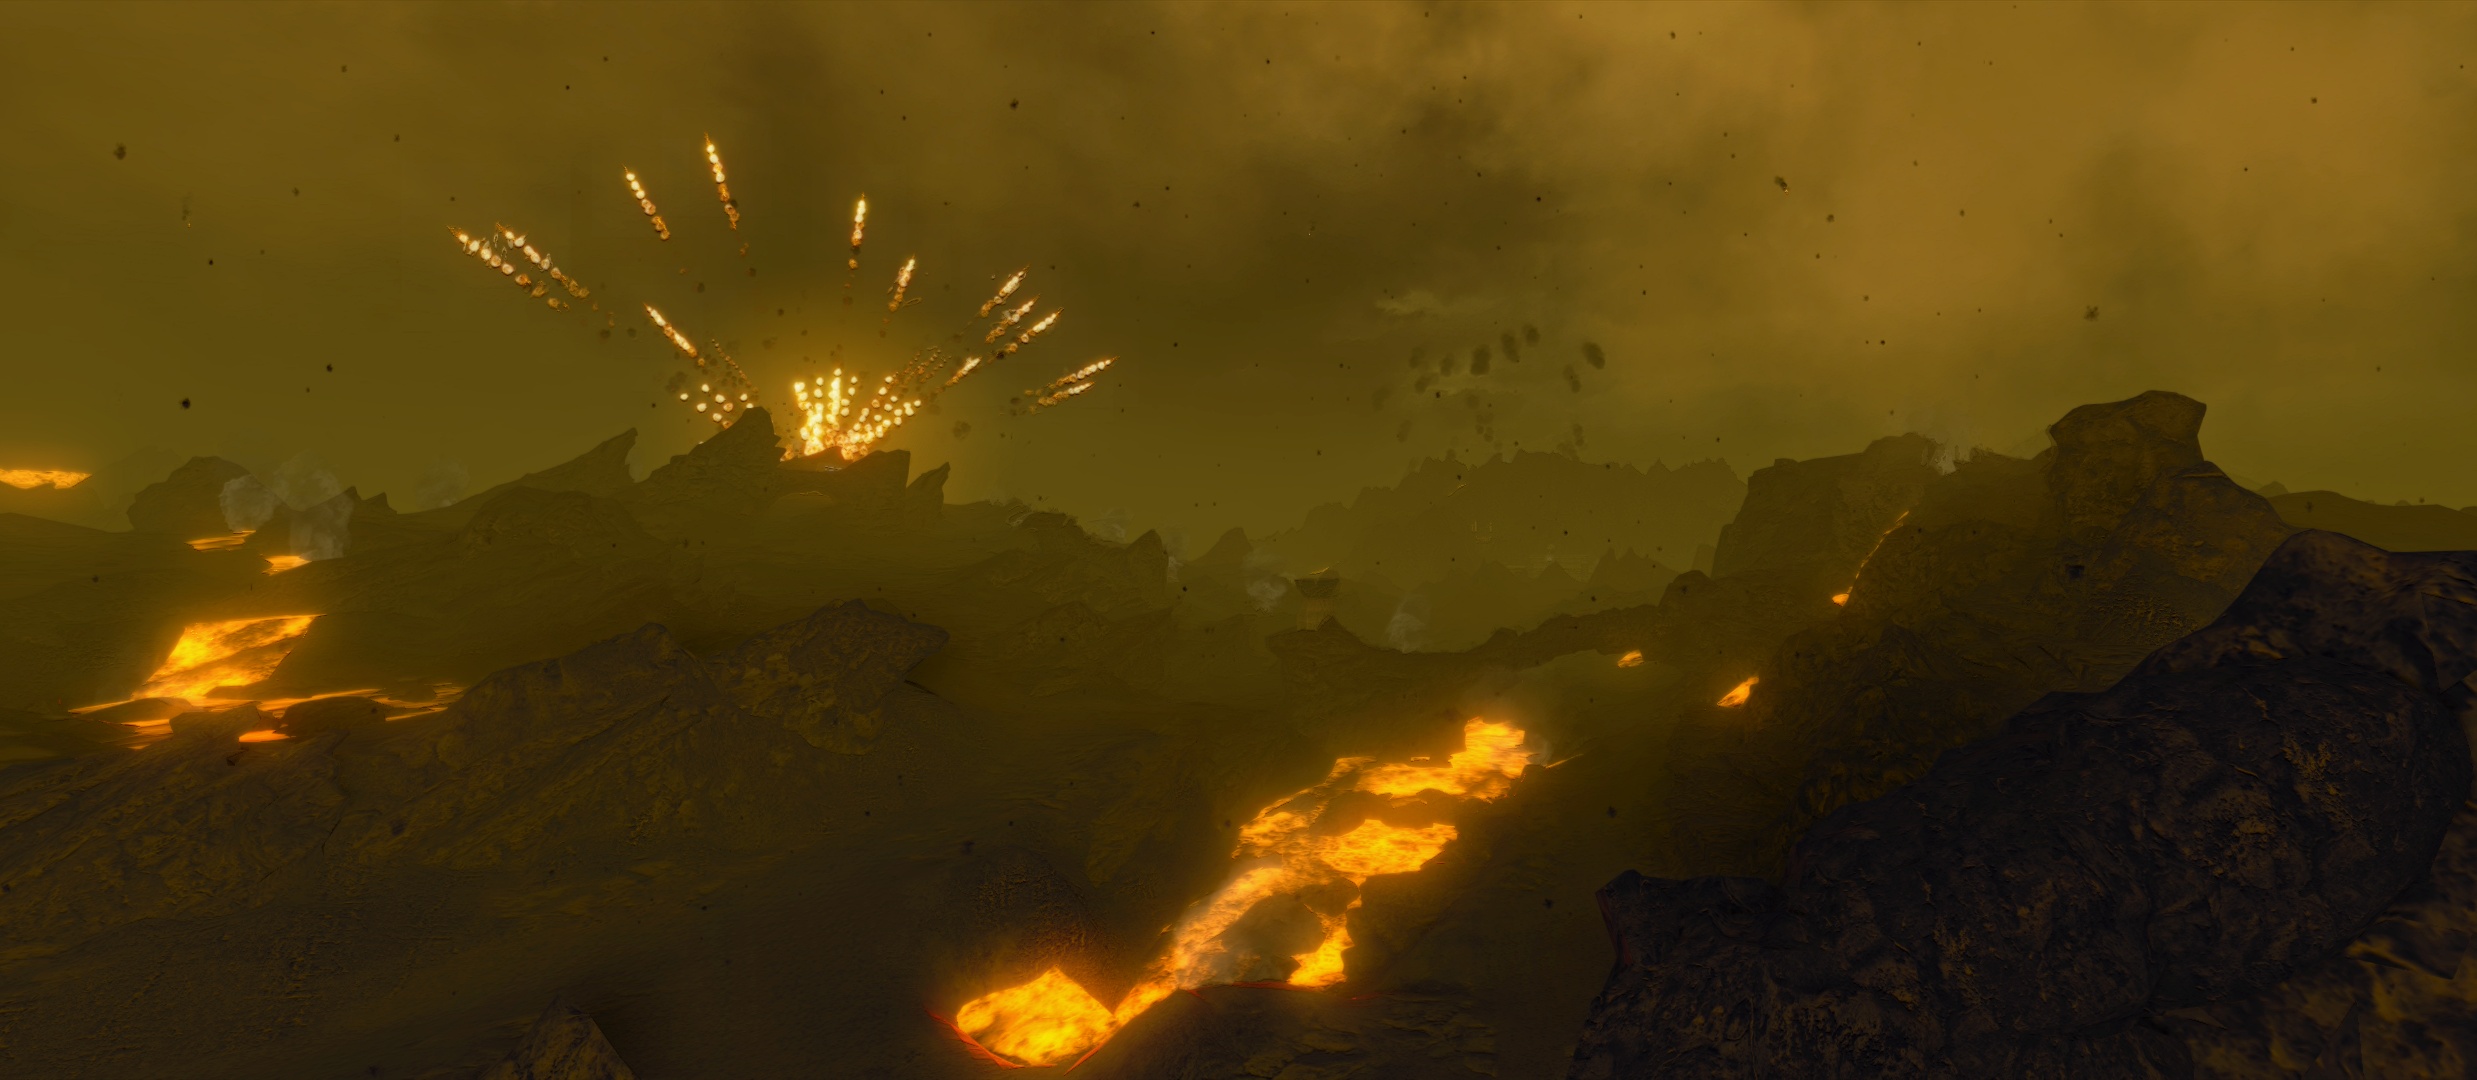
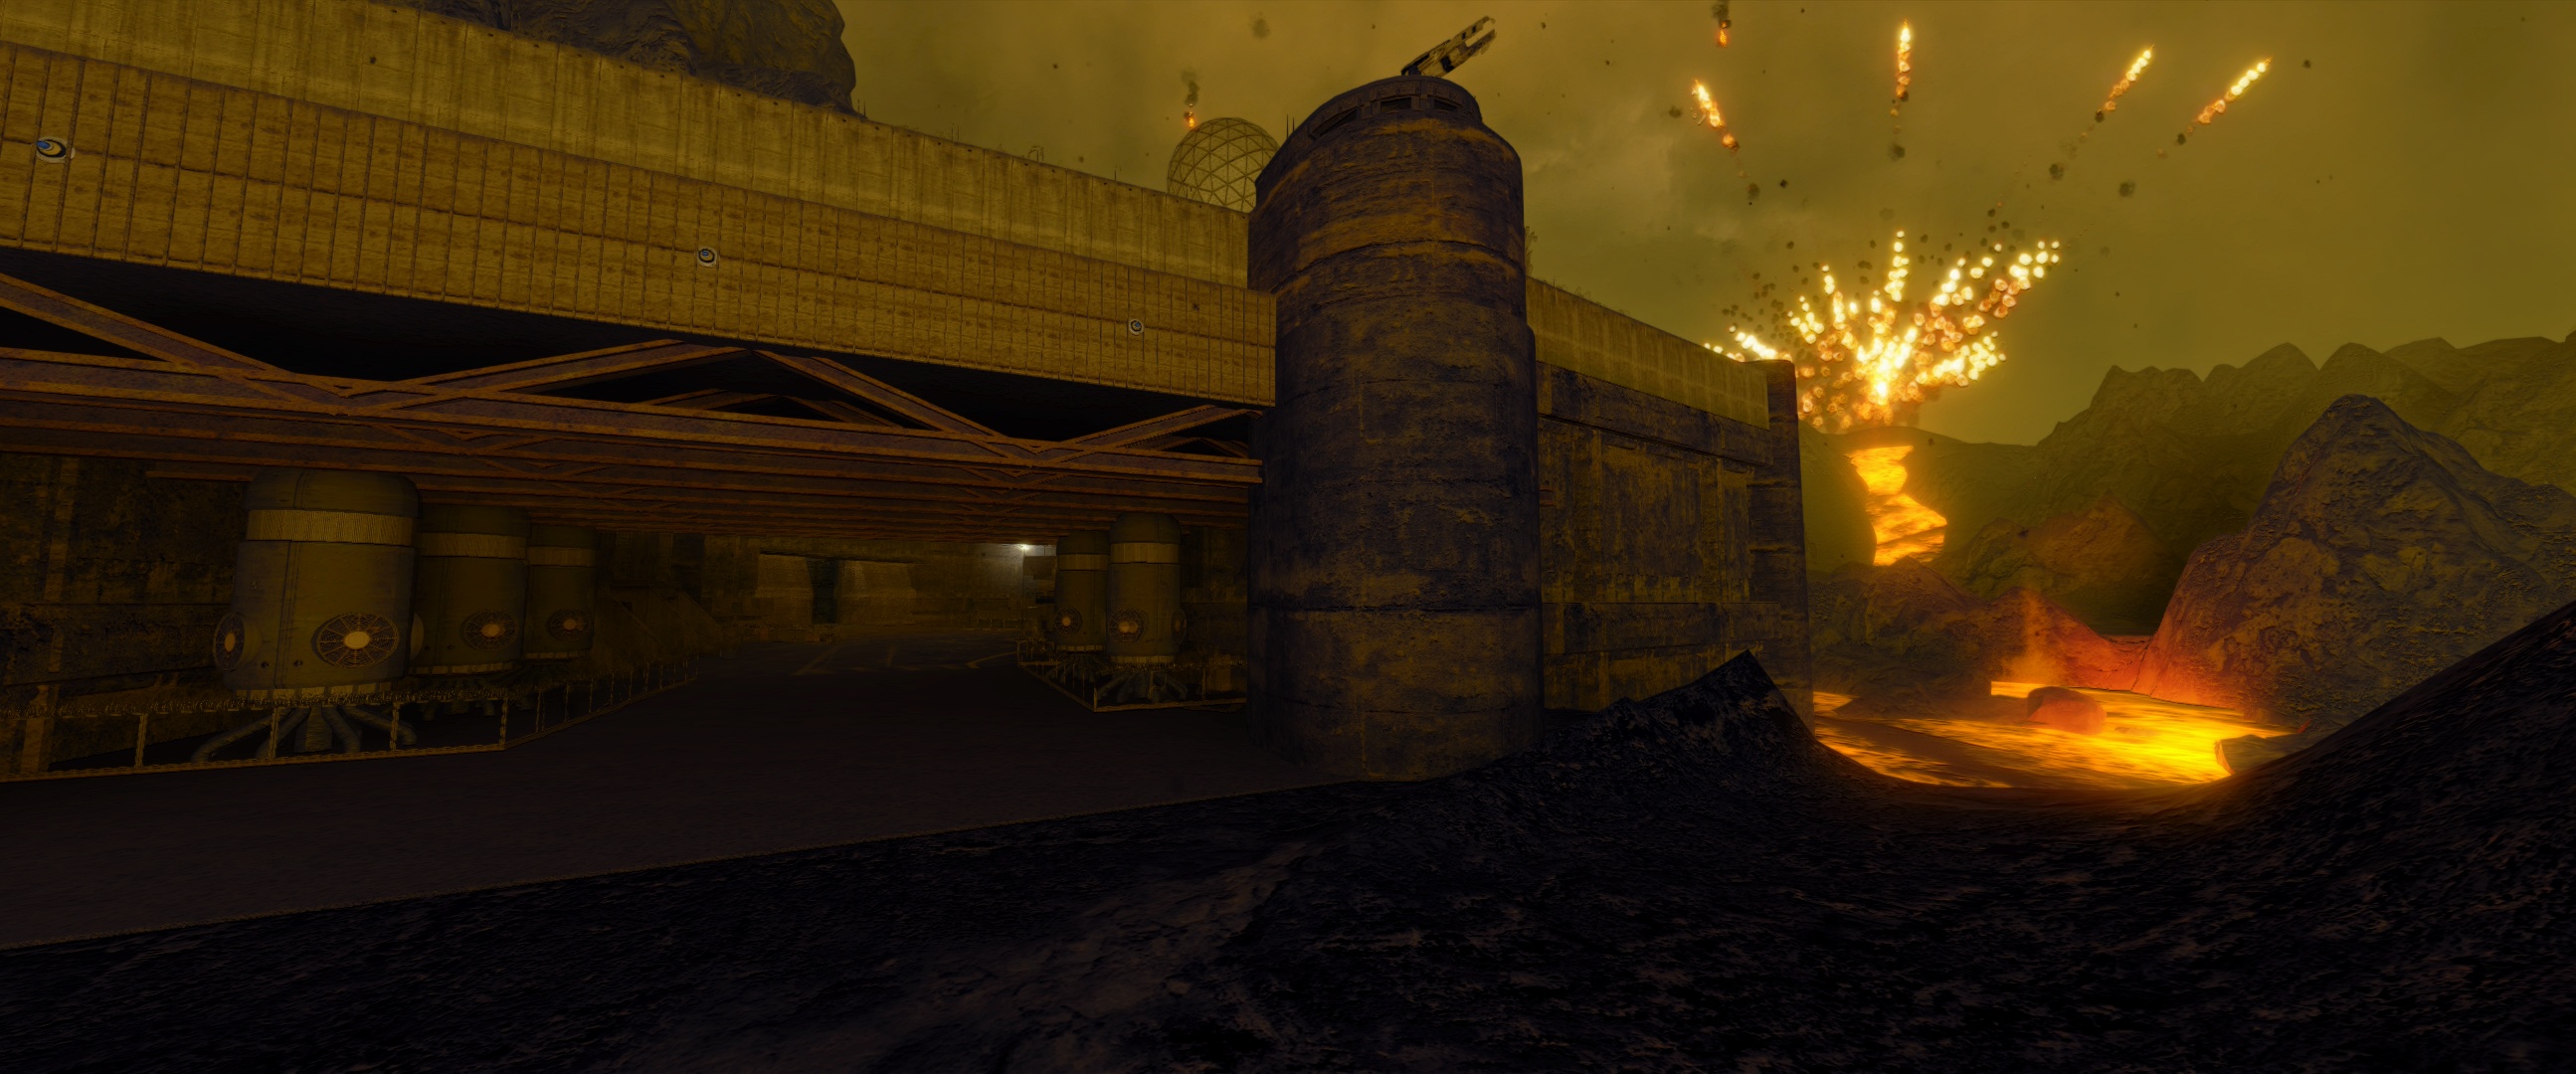
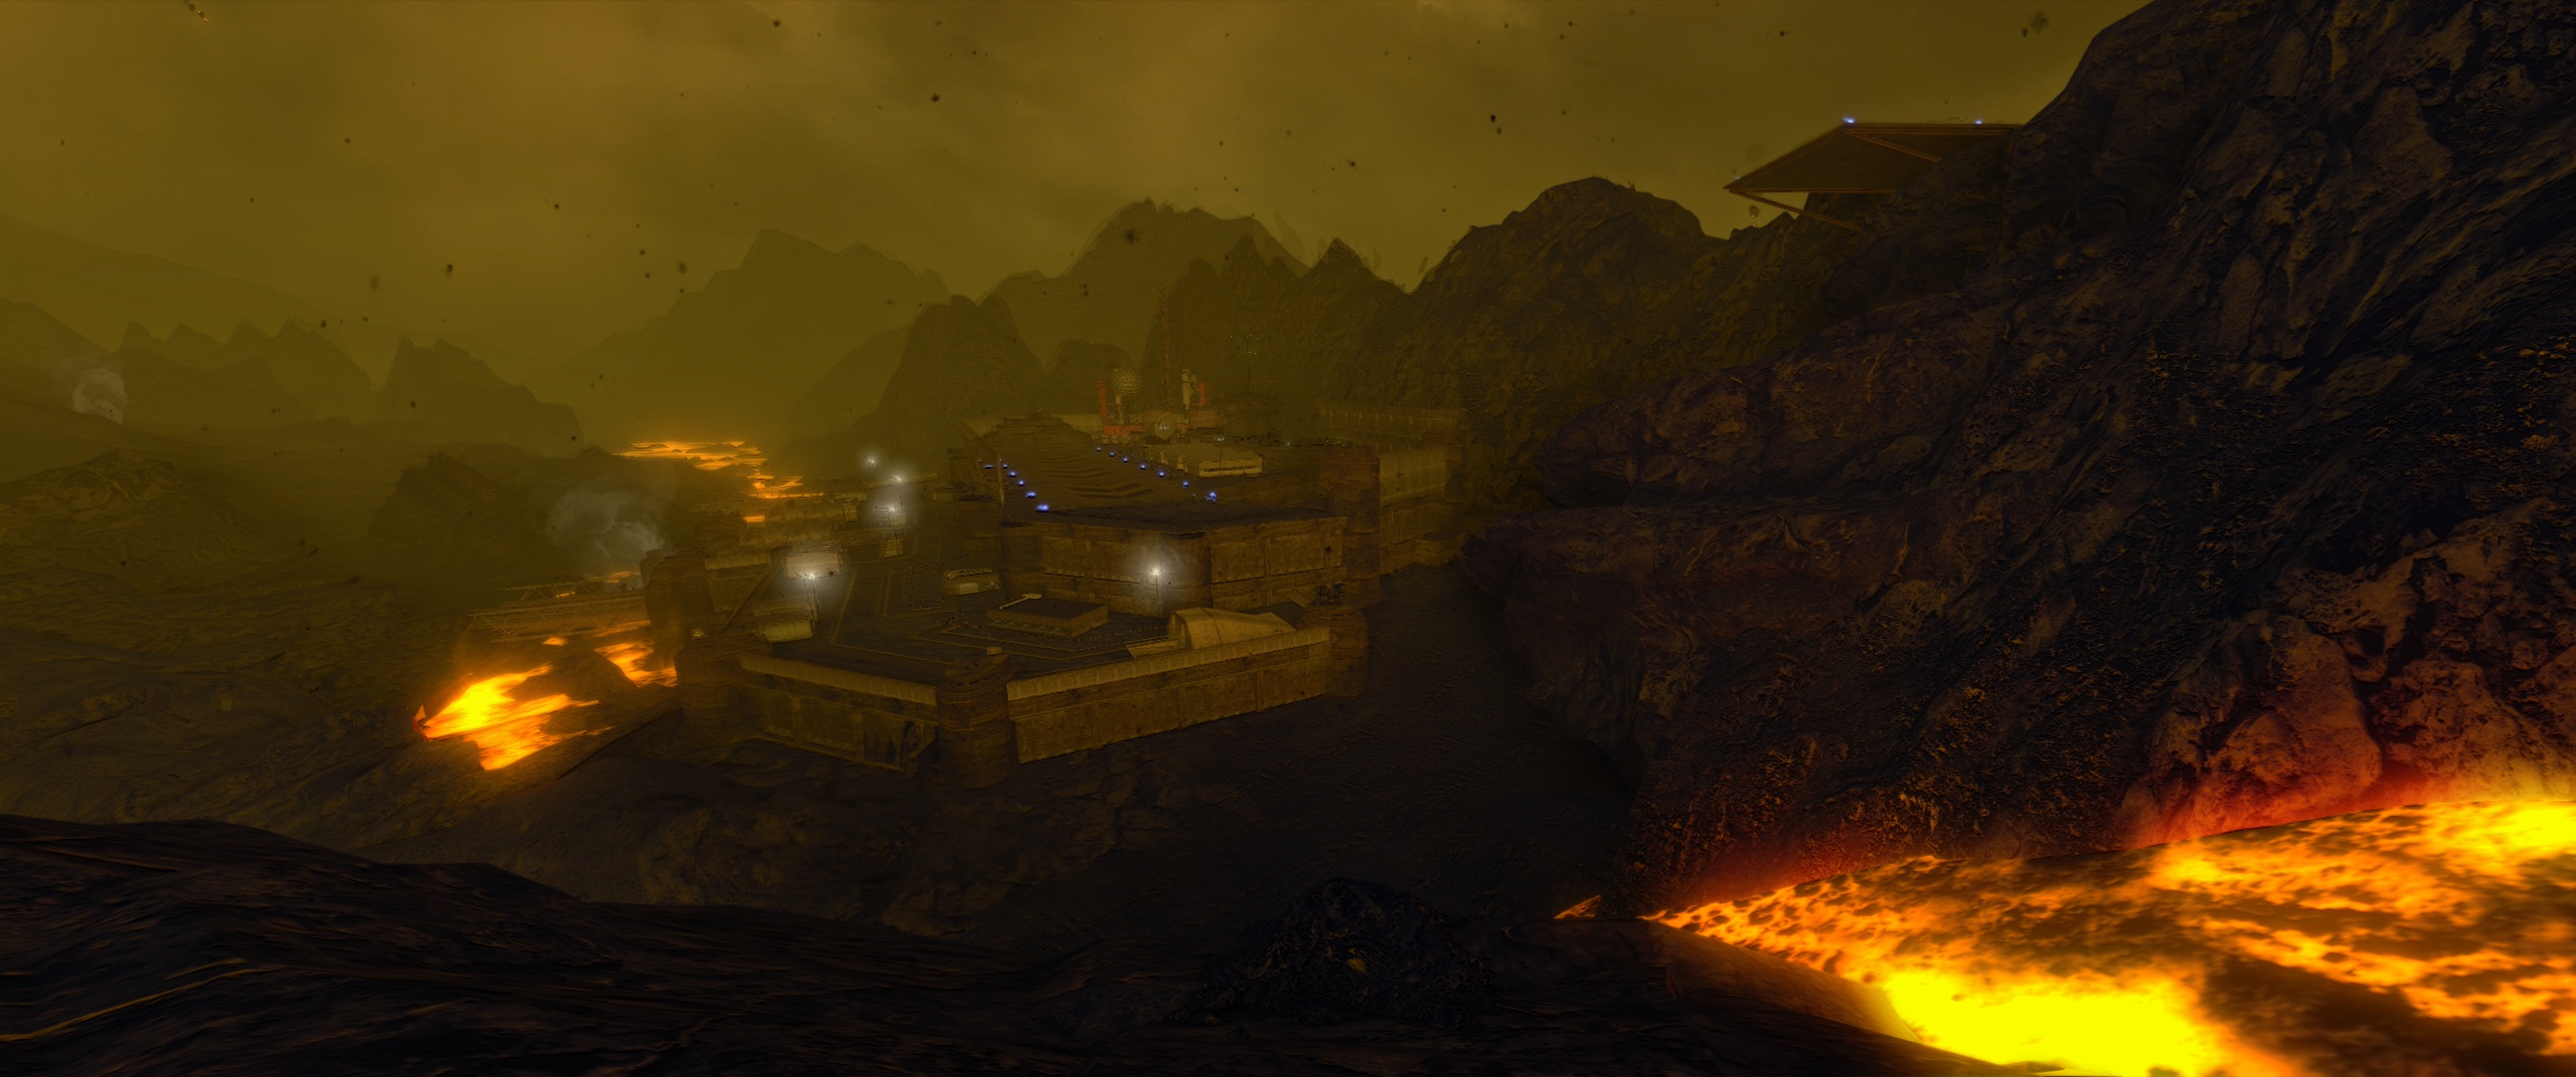
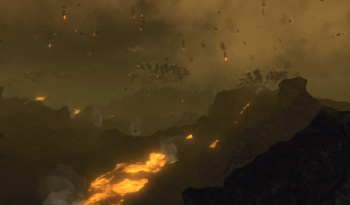
If you like it hot, this is the map for you. Inferno features the highest heat floor of any map in the game at a staggering 225 degrees. Assets with loadouts that cause sharp heat spikes are often unusable, and even some cooler-running assets will struggle with the reduced heat capacity available. A very important thing to note is that while the heat floor is very high, heat dissipation is not impacted signficantly. Your heat sinks will work largely as they would on most other maps. Flamers are very popular on Inferno and can be quite effective when deployed in a large brawl.
The map features numerous lava pools and flows, which will rapidly overheat your asset and kill you should you fall into them. Don't use any coolant while in the lava. It will cause you to heat up even faster. Use the map and zoom in if you are still learning the map's layout as it can save you from a frustrating death in this manner.
Inferno is a very center-based map, due to the 3.0x capture zone at the central caldera. This capture zone is effectively shaped like a large donut, meaning that the entire caldera must be clear of opposing players in order to flip the zone. The size of the capture zone allows for stalling/blocking tactics not commonly found on other maps, especially with Battle Armor. Brawls are frequent, though sniping from the high ground using Gauss Rifles is an effective tactic too.
The side bases on Inferno, which only allow buying & repairing up to 65t 'Mechs plus the Warhammer and Nova Cat, are still critical to hold as they are closer to the center cap zone than the main mech bays. Repair bays can be found at C5 and F4, however your team will have to supply an APC to enable reloading ammo at these locations.
Bases
- Type: neutral strategic point
- Defenses: none
- Capture weight: 3
- Spawn: Yes
- Can build: none
- Services: none