Maprelease
Contents
Maprelease
Release stages
Releasing a map is essentially providing public access to it. To release a map we have two actual stages.
Testing Release
For a map to be considered released for testing it has to be publicly accessible to, at least, the test players, if not everyone.
For this to be the case the map is usually uploaded to a public storage service and the link is to be posted on our forum or Discord.
However, for the map to be acceptable to be spun on an community server, there are a few guidelines to be followed. Those assure the process is as streamlined and stress free for all the parties involved.
Public Gaming release
For a map to be considered public it has to be present on the repositories for automatic map download.
Being clear of test release, we assume the map already conforms to the release guidelines.
Endorsed Maps
If an map shows outstanding performance or holds essential assets to the game (or both preferably) the map can undergo being endorsed to the MW:LL release.
Further constraints might ensue then. Details are to be determined, by the developer team in this case.
Guidelines
First of all the map is to be an authors work, and if it's derived work, the due credit is to be shown.
Naming conventions
There is no co-relation of the map's cry file and the map folder whatsoever. Yet, it is highly recommended to name those two the same, as well as the accompanying XML file. To avoid any undue confusion down the road. (And it's an long road - note that.)
It is customary to version the community maps so it is loud and clear which map is older and what archive it's coming from.
The versioning process is somewhat meticulous and arduous, but we have a most streamlined guide for it below.
Folder structure and hierarchy
It is advised to follow the folder structure from the first steps in the Sandbox2 editor all the way - they are not that cumbersome - but once accustomed to them many a headache will be saved later on.

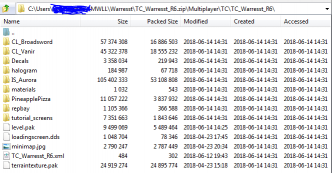
Notice the redundant path component "Multiplayer\TC\ that occur twice :
This provides for two goals:
- To remain able to work on more maps while releasing one then the other.
- To be able to keep the map in the Mods/MWLL/Game/Levels/Multiplayer/ file tree - where it belongs.
To zip a map up:
- move the map folder that's ready to be released to the 2nd Multiplayer\TC\.
- prune all the sandbox content leaving only the play files - as shown on the image
- just select the last Multiplayer folder and zip it up.
- rename the archive to the exact map folder name - TC_Warresst_R6.zip in our example.
This way you assure your published map will automagically land in the players folder when auto-downloaded from the map repository once it's hosted there.
Release Version Increment
The following are the steps occurring in the process of synchronizing content to the incremented version of the map name.
Prerequisites (apps used):
- 7zip file manager (part of the 7zip free download)
- WinRAR (trial ware file manager)
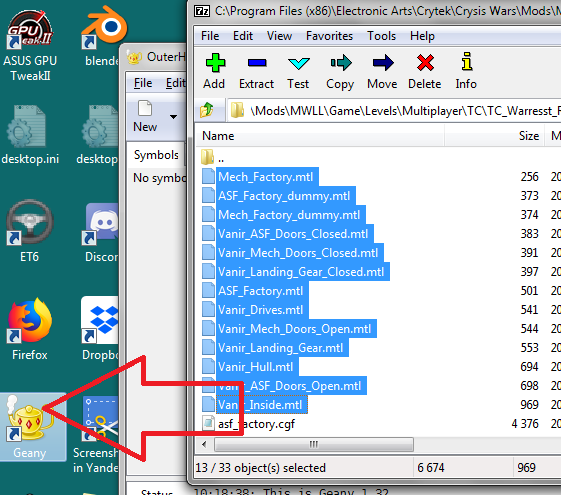
- Geany (free GPL licensed advanced code editor/IDE)
1. begin by 7z-ipping the sources and the whole folder in the TC or TSA branch. To have a point of return should anything go bork.
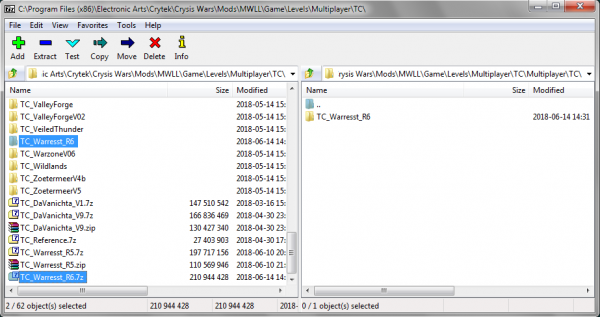
2. Rename the folder to reflect the increment of the release.

3. Proceed with renaming the files inside the folder

4. rename the cry file to associate it with WinRAR as shown
![]()
5. once opened, double click the level.editor_xml - at firts you will be prompted to associate it. Do so for your favorite advanced text editor (mine is Geany)
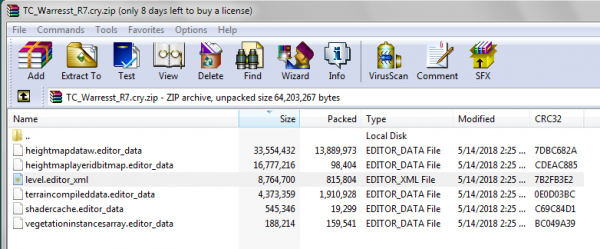
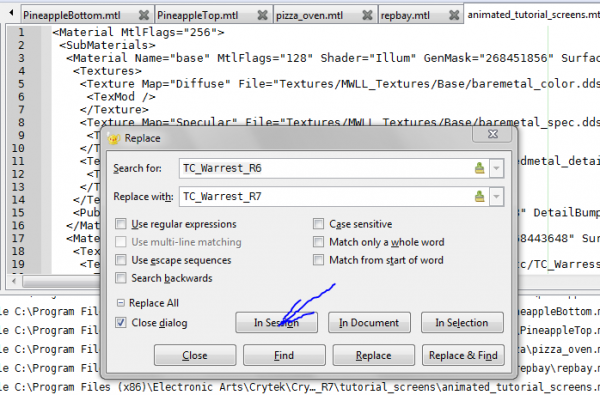
6. in the file, seek and replace ([ctrl]+[h] in Geany) all the references from to old folder name to the updated one. Geany does that on single click.
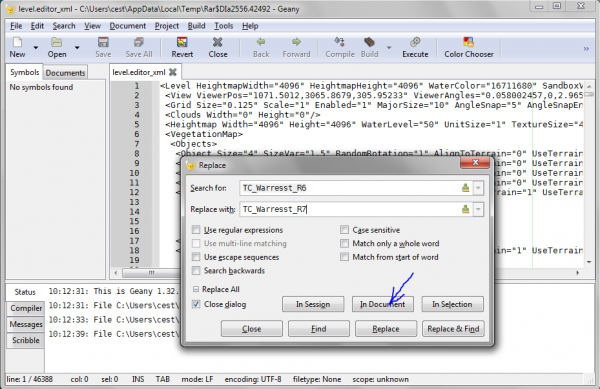
7. this can be uses as well for endorsing alien art into ones self map. Once all is updated, save the file and exit the editor. When prompted to update the zip archive - allow for it.

8. remember to restore back all the extensions you changes for the edits to occur.

9. update the maps XML file as well (Display Name field will be shown in game on the map browser) 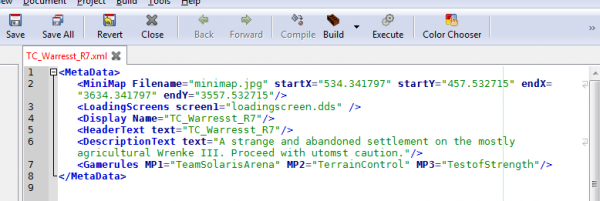
10. Find and and open all the material files in the map folder at once in the advanced editor (drag and drop works really well for this)
11. Seek and update all the references to point to the just updated folder name (in session means in all currently open files)
12. It goes without saying - all files are to be saved - Geany has save all icon handy.

13. The final test is the Sandbox 2 editor - open it and load the newly renamed map.
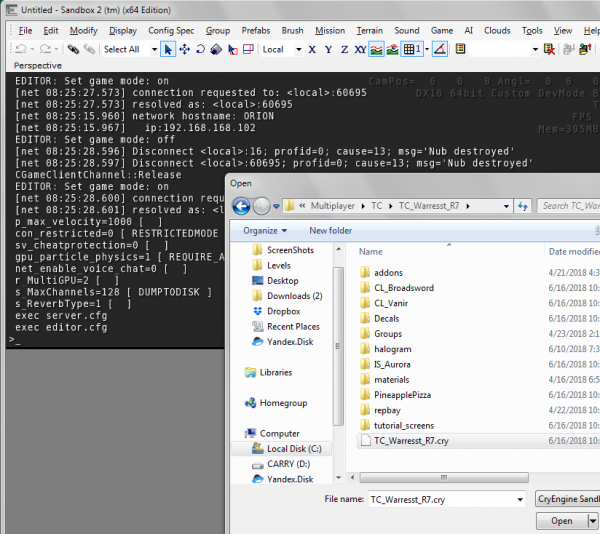
Now on you are ready to work on and apply the further tweaks and modifications to the map - and the release it afterwards.
